
Doc Martens are a popular brand of boots, and they are well-known for their hard-wearing construction and stylish design. However, one downside of these boots is that the insole can be quite uncomfortable, especially if you wear them for an extended period. In this article, we will show you how to remove Doc Martens insole so that you can replace it with a more comfortable option. Let’s get started on how to remove doc martens insoles!
It is important to note that different styles of Doc Martens boots may require a different approach when it comes to removing the insoles. For example, some shoes have removable insoles, while others do not. In addition, many newer-style boots have insoles glued in place, so it is essential to check your boot’s care instructions before proceeding.
What is the Purpose of Doc Martens Insoles?
Doc Martens boots come with an added layer of cushioning called insoles. These insoles provide extra underfoot support and comfort when walking, making them popular among people who spend a lot of time on their feet. However, some individuals may find that the provided insole does not meet their needs or preferences, which is where the option to remove and replace them comes in handy.
Needed Materials:
A Flat-head Screwdriver or a Similar Tool:
To remove the insoles, you will need a flat-head screwdriver or a similar tool with a thin and flat edge. This tool is essential as it allows you to pry up the insole from inside your boot.
A Pair of Replacement Insoles:
Replacement insoles come in various styles, thicknesses, and materials. Some popular options include memory foam, gel, and leather insoles. Make sure to choose one that meets your specific needs and preferences.
Rubbing Alcohol:
Rubbing alcohol is useful when removing the glue residue left behind after taking out the original insole.
Clean Cloth:
A clean cloth will come in handy when using rubbing alcohol to remove any remaining glue from inside your boot.
A Step-by-Step Guide on How to Remove Doc Martens Insoles
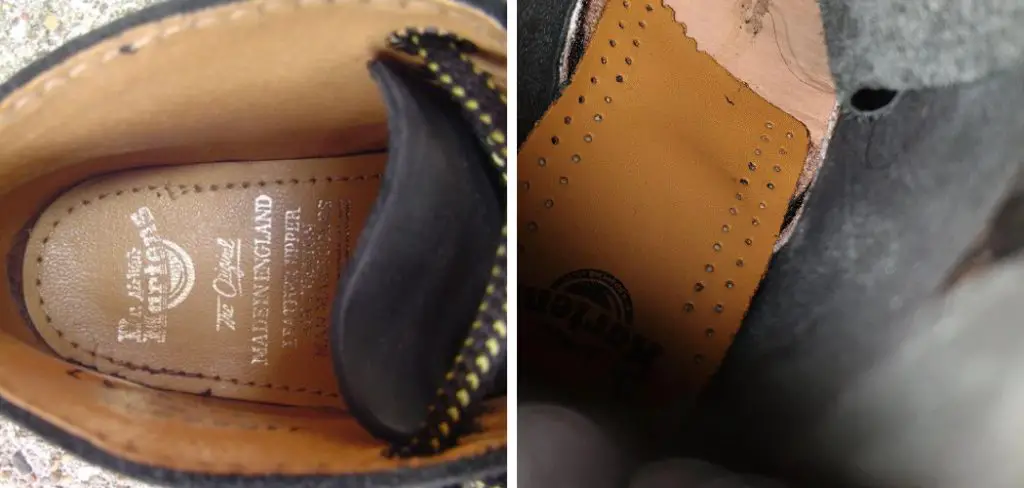
Determine the Type of Insole You Have
There are two types of Doc Martens insoles- the original leather insole and the replaceable Comfort Insole. The original leather insole is sewn into the boot and cannot be removed, while the replaceable Comfort Insole can be taken out. If you’re not sure which type of insole you have, take a look at the inside of your boot- if there are no visible seams, you have the original leather insole.
You can still add a replacement insole on top of the original leather one if you need additional comfort and support. If you have a replaceable Comfort Insole, continue with the following steps to remove it:
Remove Lace Loops if Necessary
If your boot has lace loops, you will need to remove them before taking out the insole. To do this, use a pair of scissors to cut the thread holding the loops in place. Once the loops are removed, you should be able to see the entire insole. If your boot doesn’t have lace loops, you can skip this step. You may also want to untie your laces if they are in the way.
It is important to note that not all Doc Martens boots have lace loops, so do not worry if you don’t see them in your boot. You can proceed to the next step.
Unlace Your Boot
Before removing the insole, you will need to unlace your boot. Start from the top and work your way down; loosen each lace as much as possible. Once you reach the bottom, the insole should be loose enough to remove. You may need to use a shoe horn or your fingers to help lift the insole out of the boot- it should come out relatively easily. But be careful not to damage the insole or your boot while doing this.
You may notice that the insole has a heel cup, which means it is different on each side. Make sure to take note of which side goes where before removing it.
Remove the Originally Sewn-In Leather Insole
Unfortunately, if your Doc Martens boots have the originally sewn-in leather insole, they cannot be removed without damaging the boot. Therefore, we do not recommend trying to remove this type of insole, as it will likely damage your boots. However, if you are looking to replace the insole with a more comfortable one, you can purchase an inexpensive pair of insoles and slip them into your Doc Martens boots.

Doc Martens are a popular style of boots that are both comfortable and stylish. But depending on how often you wear your shoes or what type of activities you use them for, the original leather insoles may not be as comfortable or supportive as you would like. Fortunately, it is possible to remove these insoles and replace them with new ones that better suit your needs. Here are the steps to removing the originally sewn-in leather insole from your Doc Martens boots:
Step 1:
Choose a pair of insoles that work well in your boots. There are many different insoles available, including gel-filled, memory foam, and orthotic insoles, so make sure you choose one that will provide the support and comfort you need.
Step 2:
Carefully remove the original leather insole from your Doc Martens boot. To do this, slide a butter knife or other thin flat object under the edge of the insole to separate it from the boot’s sole. Once enough of an opening has been created, gently pull out the insole by hand.
Step 3:
Slide your new insoles into place inside the boots. Trim any excess material off these new insoles until they fit neatly into your shoes.
Step 4:
Enjoy your new, more comfortable Doc Martens boots! With the right insole, you can wear these boots all day long without discomfort or soreness. So whether you’re heading out for a long hike, going on a shopping trip with friends, or just walking around town, enjoy your stylish and supportive Doc Martens boots.

Remove Glued-in Doc Martens Insoles
If your Doc Martens boots have the newer style of glued-in insoles, you will need to take a different approach when removing them. These insoles cannot be pulled out by hand, so you will need to use a heat gun or hair dryer to loosen the glue holding them in place.
Step 1:
Figure out which end of the insole is glued down. You may be able to tell by looking at the bottom of your boots, and if not, you can try feeling around until you find the edge glued down.
Step 2:
Using a hairdryer or heat gun, gently heat the area where the insole is glued. Move the heat source around constantly to avoid overheating any one spot.
Step 3:
Once the glue has softened, carefully use a flathead screwdriver to pry up one corner of the insole, being careful not to tear it or damage your shoes.
Step 4:
Continue heating and prying until you have removed all of the insoles from your Doc Martens boots. Clean and air out your boots, then insert new insoles to get the most out of your comfy and stylish footwear!
Once your Doc Martens insoles have been removed, you can either replace them with new ones or leave the boots as is. If you decide to replace the insoles, be sure to check the fit and style of your shoes before making a purchase. And if you’re looking for a more comfortable alternative to glued-in insoles, consider investing in some easy-to-remove slip-on insoles instead!
Remove Stuck on Doc Martens Insoles
If your Doc Martens insoles are stuck on and won’t come off easily, don’t despair! With patience and the right tools, you can remove them without damaging your boots.
Step 1:
Use a flathead screwdriver to pry up one corner of the insole gently. Be sure not to apply too much pressure, as this could cause damage to your boots or tear the insole.
Step 2:
Gently peel back the insole, being careful not to tear it.
Step 3:
Use a damp cloth to gently clean and dry your insoles. You can also use a mild soap and water mixture if needed.

Step 4:
Allow your insoles to air dry for at least 24 hours before putting them back into your boots.
If you’re still having trouble removing your Doc Martens insoles, consider contacting the company directly for additional assistance or replacing them altogether. With proper care and maintenance, your Doc Martens boots will last for years to come! This is crucial when removing doc martens insoles.
Why Do My Doc Martens Hurt the Top of My Foot?
There are several possible reasons why your Doc Martens might cause discomfort on the top of your foot. One possibility is that the size or shape of your feet does not match up well with the design of the shoes. For example, if the footwear is too narrow for your feet, it can result in points of stress and pressure on areas like the top of the foot, which can cause pain and inflammation.
Another potential issue is that you may simply be wearing the shoes incorrectly, causing undue strain and pressure in certain areas. Ultimately, determining exactly what is causing your Doc Martens to hurt requires an assessment by a trained professional, such as your doctor or podiatrist. With their help, you can pinpoint the cause and get appropriate treatment to continue to enjoy wearing these popular and stylish shoes without discomfort.
How Tight Should Docs Be?
Doc Martens shoes are meant to be worn tight. This is because they will stretch and conform to the shape of your foot over time. If you buy a pair of Docs that are too loose, they will never really feel comfortable or supportive.
You don’t want to buy such a tight pair that they’re painful. The best way to figure out if a pair of Docs are too tight is to wear them for a few minutes and see how they feel. If your feet start to hurt, or if you can feel the shoes digging into your skin, then they’re probably too tight.
If you’re having trouble finding a pair of Docs that fit well, try going up a size. While this may feel odd at first, it can be a great way to ensure that your shoes will fit comfortably and stay supportive for years to come. So, if you’re struggling with tight Docs, don’t give up – try going up a size and seeing how it works!
Will Doc Martens Stretch?
The simple answer to this question is yes, Doc Martens will stretch. However, the amount of stretching that they undergo can vary depending on several factors, including the type of leather made from and how frequently they are used. For most types of Doc Martens, regular wear should be enough to cause a gradual stretching over time.

However, it is also possible to speed up this process using various methods, such as soaking and drying the boots in hot water or exposing them to extreme temperatures with a hairdryer. Ultimately, whether or not your Doc Martens will stretch depends on your preferences and needs, so it is important to thoroughly consider all aspects before deciding on a course of action.
Of course, if you’re experiencing any issues or concerns with your particular pair of boots, it’s always best to consult a professional for advice. After all, that’s what they’re there for!
Additional Tips:
- When trying on Doc Martens in the store, make sure to walk around and get a feel for how they fit before purchasing.
- Consider investing in high-quality, cushioned socks to help break in your new boots and provide added comfort.
- If you’re experiencing any pain or discomfort while wearing your Doc Martens, don’t hesitate to consult a professional for advice and potential solutions.
- Regularly clean and care for your Doc Martens to prolong their lifespan and maintain their comfort and style.
- If you’re unsure about how to properly remove or replace insoles, seek out tutorials or consult with a shoemaking expert for guidance.
- Don’t be afraid to experiment with different insole options to find the best fit and comfort level for your specific foot shape and needs.
- Consider purchasing a shoe stretcher to help stretch out any tight spots or areas in your Doc Martens.
- Invest in a good quality leather conditioner to keep your boots soft, supple, and comfortable over time.
- If you choose to use heat as a method to stretch your boots, be sure to do so carefully and gradually to avoid damaging the leather.
- Always make sure to read and follow the manufacturer’s instructions when caring for your Doc Martens in order to avoid any potential damage or issues. So go ahead, enjoy wearing your Doc Martens with confidence and comfort knowing that you have the knowledge and tools to properly care for them. With proper care, your Doc Martens can last for many years to come! Happy wearing!
You Can Check It Out to Remove Vans Insoles
Frequently Asked Questions:
Q: Can I Replace My Doc Martens Insoles With Any Other Brand?
A: Yes, you can choose to replace your Doc Martens insoles with other brands as long as they are the correct size and shape for your boots. You can also opt for slip-on insoles that are easier to remove and replace. It’s important to choose insoles that provide good support and fit comfortably inside your boots. It’s also a good idea to try on the insoles before purchasing to ensure they fit your feet well.
Q: How Often Should I Replace My Doc Martens Insoles?
A: It is recommended to replace your Doc Martens insoles every 6-12 months, depending on how often you wear them and the level of comfort and support they continue to provide. If you start to notice discomfort or lack of support, it may be time to replace your insoles for optimal foot health and comfort.
Q: Can I Wear My Doc Martens Without Insoles?
A: You can choose to wear your Doc Martens without insoles, but keep in mind that the insoles are designed to provide cushioning and shock absorption, as well as support for your feet. Without insoles, you may experience discomfort and pain from the lack of support. It’s best to replace worn or uncomfortable insoles with new ones rather than going without.
Q: How Can I Maintain My Doc Martens to Ensure Longevity?
A: To maintain your Doc Martens, it is important to regularly clean and condition the leather to keep it soft and supple. You should also avoid exposing them to extreme temperatures or moisture, as this can cause damage or stretching. Additionally, make sure to store them in a cool, dry place when not in use. With proper care and maintenance, your Doc Martens can last for many years to come! So don’t hesitate to take a little extra care to ensure you can continue enjoying your favorite pair of boots for a long time.
Conclusion:
Now that you know how to remove Doc Martens insoles, it’s time to put your new skills into practice. So give them a try, and let us know how it goes!
You May Also Read: How to Remove Glued Insoles