Are you looking for a fun and easy Halloween project? Look no further than these witch shoes! With just a few simple materials, you can make a pair of shoes that will complete your witch costume.
Shoes are probably the most important of all the things that witches wear. A good pair of witch shoes can help you to cast spells and ward off evil spirits.
But how do you make your own witch shoes? Witches’ shoes are a must have for any aspiring witch. But finding the perfect pair of shoes can be tricky. If you’re not careful, you could end up with shoes that are too small or too big.
This blog post will show you how to make witch shoes using a few simple steps. So, what are you waiting for? Start crafting!
Summary: Create a unique and spooky look for your costume this Halloween with DIY witch shoes! Start by gathering the necessary supplies, such as black fabric, craft glue, scissors, and ribbon. Cut out two large pieces of fabric that will be used to make the shoes. Glue ribbons around the perimeter of each piece and then glue them together at the toes.
Tools and Materials You Need
- A pair of black shoes (flats or heels, it’s up to you!)
- Black felt
- Glue
- Scissors
- Silver glitter
- Purple and green acrylic paint
- Paint brushes
With these materials, you can create a pair of witch shoes that is perfect for any halloween costume or occult gathering.
10 Easy Steps on How to Make Witch Shoes
Step 1: Paint the Shoes:
First, paint the shoe black using acrylic paint and a paintbrush. Allow the first coat to dry before adding a second coat for full coverage. Because the shoes will be covered in felt and glitter, they don’t have to be perfect. This step is optional, but it helps to make the shoes look more like real witch shoes.
Step 2: Cut out Felt Shapes:
Next, scissors cut out small triangular shapes from the black felt. These will be used as the pointy toes of your witch shoes. Be careful not to make them too big, as you want the shoes to be still comfortable to walk in.
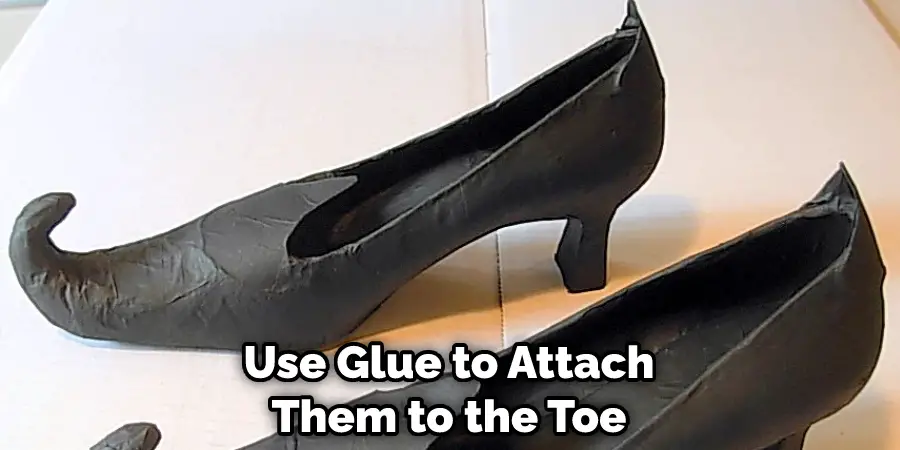
Step 3: Glue on Felt Shapes:
Once your felt shapes are cut out, use glue to attach them to the toe of each shoe. Allow them to dry completely before moving on to the next step. Make sure to use a strong adhesive to ensure the shapes stay in place. Use the photo as a guide for placement, or feel free to get creative with your own design.
Step 4: Check for Glue Drying:
Once the glue has dried, make sure the felt shapes are securely attached to the shoes. You may need to add more glue if any of the shapes come loose. Be careful not to get any glue on the shoe itself, as it may be difficult to remove.
Step 5: Add Studs and Gems:
Use a hot glue gun to add studs and gems onto the felt shapes and shoe surface for added embellishment. Again, refer to the photo for placement ideas or use your own creativity.
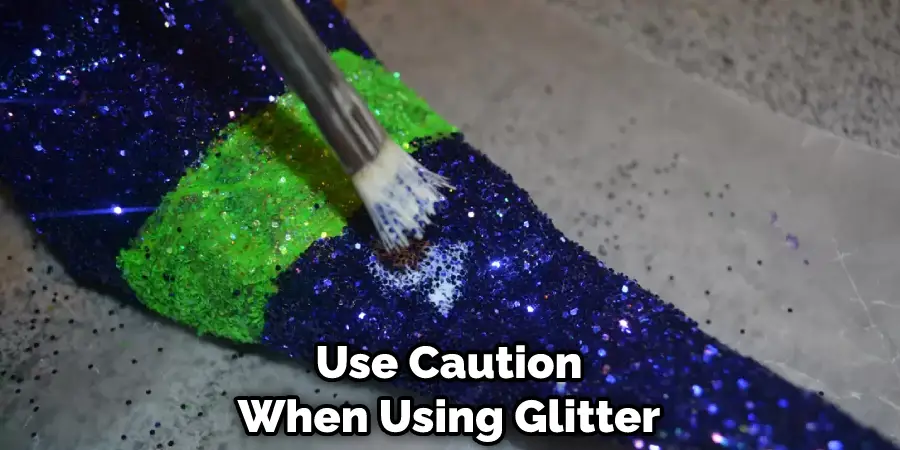
Step 6: Paint on Glitter:
Using a small paintbrush, paint on glue in a pattern on the shoes. Then, sprinkle silver glitter onto the glue while it is still wet. Shake off excess glitter and allow the shoes to dry completely before wearing them.
Step 7: Optional Decorations:
For added decoration, use purple and green paint to add witchy symbols or designs onto the shoes. You can also add studs and gems to these areas for extra embellishment.
Step 8: Use a Clear Sealant:
To ensure that your shoes stay in good condition, use a clear sealant on the entire shoe surface. This will help to prevent the glitter and embellishments from falling off. Allow the sealant to dry completely before wearing your witch shoes.
Step 9: Add Laces or Straps:
If your shoes do not have straps or laces, add them using black ribbon or string. This will help to keep the shoes secure on your feet while walking and dancing the night away.
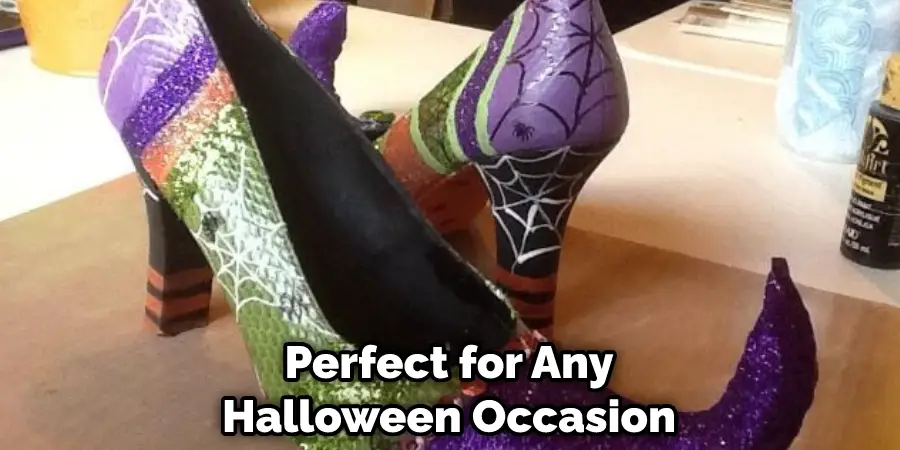
Step 10: Show Off Your Witch Shoes:
You did it! You now have a unique and handmade pair of witch shoes that are perfect for any halloween occasion. Show them off with pride, and may the powers of witchcraft guide your steps.
And there you have it – your very own pair of witch shoes! Now, all you need is a broom and a black hat, and you’ll be ready to cast some spells. Happy crafting, witches!
7 Additional Tips and Tricks
- For added durability, use waterproof glue and sealant on the shoes.
- If you don’t have glitter, try using sparkly sequins or rhinestones for embellishment instead.
- Adding a pointed toe to the shoe will give it an even more witchy look.
- Use black ribbon to make straps or buckles on the shoes.
- Experiment with different materials and textures, such as feathers or faux fur.
- If you want to add height, try gluing a small block of wood or foam to the sole of the shoe before decorating it.
- Have fun with it, and let your creativity run wild! The sky’s the limit when it comes to designing your witch shoes.
These tips and tricks are just suggestions to help enhance your witch shoe creation process. Feel free to try out new ideas and techniques as well.
7 Precautions You Can Take While Making Witch Shoes
- Make sure to use caution when using hot glue guns and other sharp tools.
- Keep small objects and materials out of reach of children or pets.
- Be careful not to burn yourself or others with hot glue or paint.
- Follow the instructions provided on any adhesives or sealants you use, and use them in a well-ventilated area.
- Take breaks while working to prevent fatigue and accidents.
- Use caution when using glitter or sparkles, as they can be a choking hazard if inhaled.
- Double check your finished shoes for any loose or sharp pieces before wearing them. Happy crafting!
Taking precautions while crafting is always important to ensure your safety and the longevity of your project. Keep these tips in mind as you design and create your witch shoes.
Different Witch Shoes Making Ideas
- Try using black faux leather for the shoe base, and decorate it with silver studs and spikes.
- Use green or purple feathers to make the shoes mystical.
- Add a small cauldron charm or dangling spider charms for added witchy flair.
- Use platform soles or heels for extra witchy drama for added height.
- Use glow in the dark fabric paint to add some spooky detailing to your shoes.
Remember to have fun and use your creativity when designing your witch shoes!
Frequently Asked Questions
Can You make Witch Shoes With Paper?
Yes, you can use paper to make witch shoes by cutting out shapes and using glue or tape to assemble them onto a shoe base. However, they may not be as durable as using fabric or other materials.
You can use different kinds of paper, such as construction paper or cardstock, to add texture and dimension to your witch shoes. Another option is to use cardboard to make a sturdy shoe base and then decorate it with paper shapes.
Moreover, you can also use paper to make accents or embellishments, such as bows or cauldrons, for your witch shoes.
Can Witch Shoes Be Worn every day?
It depends on the materials used in making the shoes. If they are made with durable materials and secured well, they can potentially be worn every day. However, they may not be as comfortable as regular shoes.
Can Witch Shoes Be Worn In Rainy Weather?
It is not recommended to wear witch shoes in rainy weather, as the water may damage the materials and construction of the shoes. It is best to save them for dry, indoor occasions.
Can Witch Shoes Be Worn to Formal Events?
It may depend on the shoes’ design and the event’s dress code. If they are made with elegant materials and subtle detailing, they could potentially be worn to a formal event. However, it is best to use your discretion and dress appropriately for the occasion.
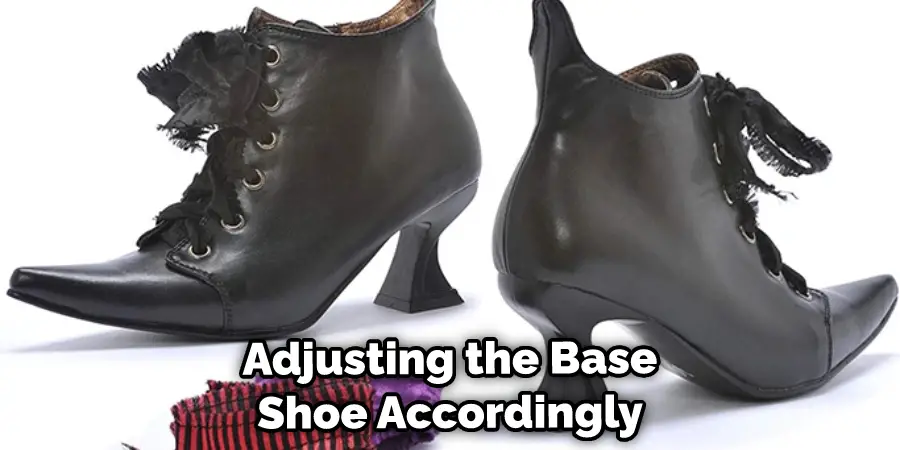
Can Witch Shoes Be Customized to Fit My Size?
Yes, potentially. You can customize which shoes fit your size by adjusting the base shoe accordingly or adding padding if needed. However, it is always best to try on a shoe before fully committing to customization.
Conclusion
So there you are some tips and ideas on how to make witch shoes. Now you know how to make your own witch shoes. Whether you’re looking for a fun halloween costume or just want to add a touch of the occult to your everyday look, these shoes are perfect.
Making witch shoes can be daunting at first, but with the right materials and a little bit of patience, you can have a unique and stylish addition to your wardrobe. Remember to use caution when using hot glue or other sharp tools, keep small objects out of reach, and wear them with care.
Hopefully, the article is helpful and informative for you. Have fun with the creative process, and be safe while crafting! Have your own witch shoes, and don’t forget to show off your finished product! Happy haunting!
