
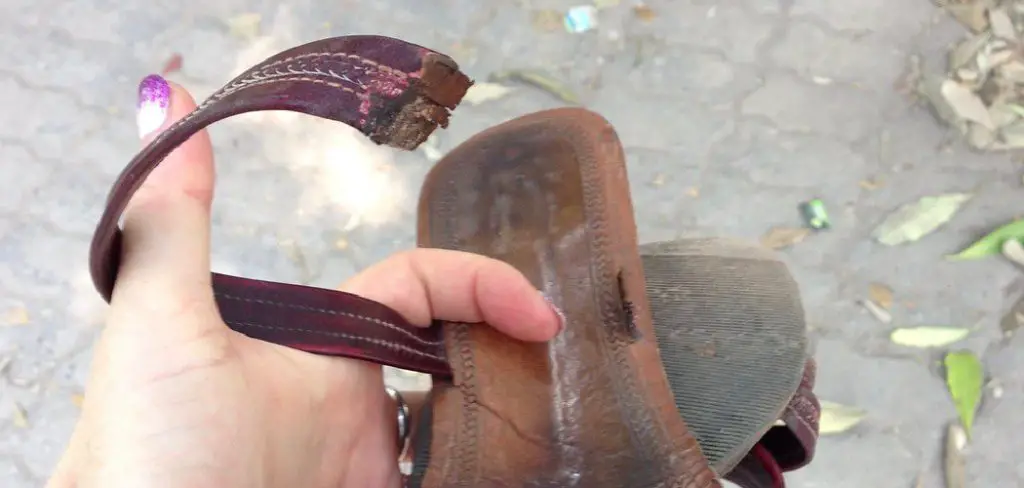
When the inevitable wear and tear of time result in broken sandals, don’t despair – the journey of your favorite footwear is far from over. Learning how to fix broken sandals not only extends the life of your cherished pair but also allows you to unleash your inner handyman. In this article, we’ll explore versatile and straightforward techniques to mend various types of sandal maladies, from snapped straps to damaged soles.
Whether you’re facing a broken buckle, detached sole, or other common sandal ailments, our guide will provide you with practical solutions, ranging from simple at-home fixes to resourceful DIY repairs. Say goodbye to the disappointment of parting with your favorite sandals and hello to a renewed sense of accomplishment as you revive them with ingenuity, ensuring many more comfortable and stylish strides ahead.
Importance of Fixing Broken Sandals
Fixing broken sandals is an important skill to have, especially during the warm summer months when we tend to wear them more often. Not being able to wear our favorite pair of sandals due to a broken strap or sole can be frustrating and inconvenient. However, instead of throwing them out and buying a new pair, learning how to fix them can save us money and reduce our carbon footprint.
Sustainable Solution
In today’s world, it is crucial to adopt sustainable practices and reduce our impact on the environment. By fixing broken sandals instead of throwing them away, we are reducing the amount of waste that ends up in landfills. This helps to preserve natural resources and reduces pollution caused by the production of new sandals.
DIY Resourcefulness
Learning how to fix broken sandals also allows us to tap into our resourcefulness and creativity. Instead of relying on someone else or constantly buying new products, we can take matters into our own hands and find ways to repair items ourselves. This not only empowers us but also allows us to customize and personalize our belongings, making them truly unique.
Convenience
Fixing broken sandals can also add convenience to our lives. Instead of having to run out and buy a new pair when one breaks, we can simply fix it ourselves at home. This saves time and hassle while also ensuring that we always have a working pair of sandals ready to wear.
10 Methods How to Fix Broken Sandals
1. Glue
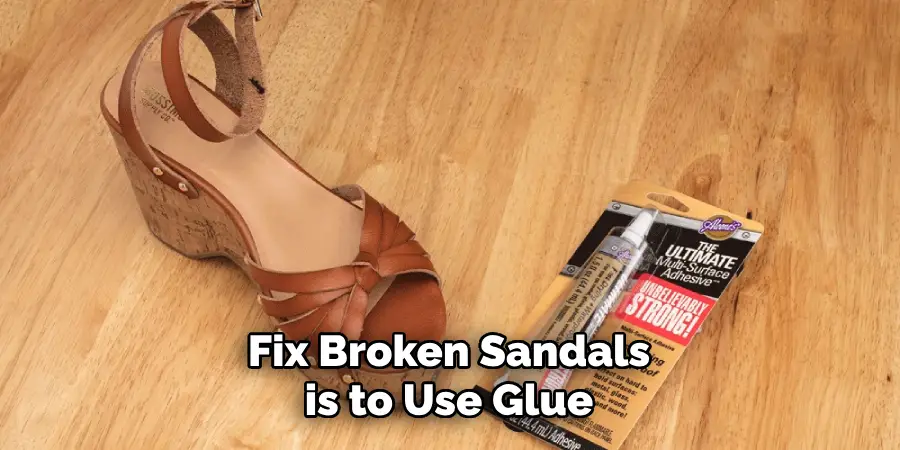
One of the easiest and most common methods to fix broken sandals is to use glue. There are a variety of different types of glue that can be used, such as super glue, shoe glue, or even fabric glue. It’s important to make sure that the area where the sandal is broken is clean and dry before applying the glue. Once the glue has been applied, it’s important to hold the two pieces together for several minutes until the glue has had time to set.
2. Stitching
Another method to fix broken sandals is stitching them back together with a needle and thread. This method requires some basic sewing skills but can be done with any type of thread, such as cotton or polyester. It’s also important to make sure that the stitches are tight enough so that they won’t come undone easily.
3. Shoe Tape
Shoe tape is another easy way to fix broken sandals. This type of tape comes in a variety of colors and sizes and can be used on all types of materials, including leather and canvas. To use this method, simply apply the tape over the area where the sandal is broken and press down firmly until it sticks in place.
4. Velcro
Velcro is another great option for fixing broken sandals as it provides a strong bond between two pieces of material without having to use any tools or adhesives. To use velcro for this purpose, cut two small pieces of velcro large enough to cover both sides of the area where your sandal is broken and then attach one piece on each side using either an iron or a hot glue gun.
5. Rivets
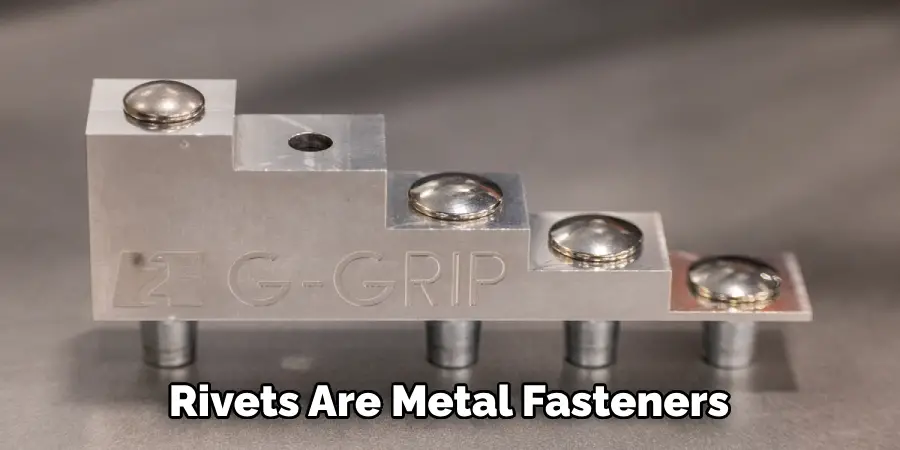
Rivets are metal fasteners that can be used to repair broken sandals by attaching two pieces of material together securely without having to use any adhesives or tools other than a hammer or rivet gun. To use this method, simply place a rivet through both sides of your sandal where it has become separated and then hammer it into place with either a hammer or rivet gun until it is secure.
6. Buckles
Buckles can also be used as an effective way to repair broken sandals by replacing old buckles with new ones if necessary or by using existing buckles from other pairs of shoes you may have lying around at home (such as flip flops). To do this, simply remove any existing buckles from your old pair of shoes (if applicable) and then attach them securely onto your new pair using either screws or rivets depending on what type of buckle you are using.
7. Heat Sealing
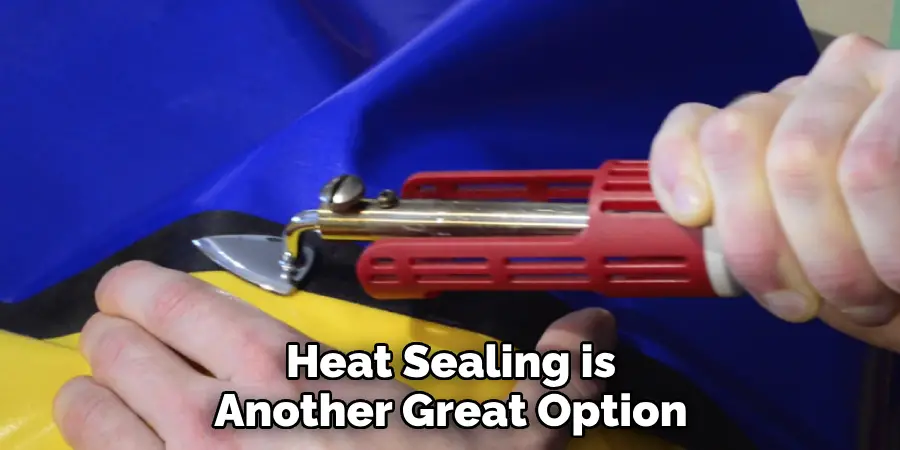
Heat sealing is another great option for repairing broken sandals because it provides a strong bond between two pieces without having to use any adhesives or tools other than a heat sealer machine (which can typically be purchased at craft stores). To use this method, simply place both sides of your sandal where it has become separated onto a heat sealer machine (making sure not to overlap them) and then press down firmly until they stick together securely when cooled off afterward).
8. Nylon Webbing
Nylon webbing is another great option for fixing broken sandals because it provides an extra layer of strength when attached properly with either screws or rivets, depending on what type you are using (for example, nylon webbing with metal grommets). To use this method, simply cut two strips of nylon webbing large enough so that they cover both sides where your sandal has become separated and then attach them securely onto each side using either screws or rivets, depending on what type you have available at home (or purchase online).
9. Rubber Bands
Rubber bands are yet another great option for fixing broken sandals because they provide an extra layer of strength while also being relatively inexpensive compared to other methods mentioned above such as heat sealing or nylon webbing with metal grommets etc… To use rubber bands for this purpose, simply wrap several rubber bands around both sides where your sandal has become separated in order to hold them together securely while still allowing some flexibility when walking around in them afterward!
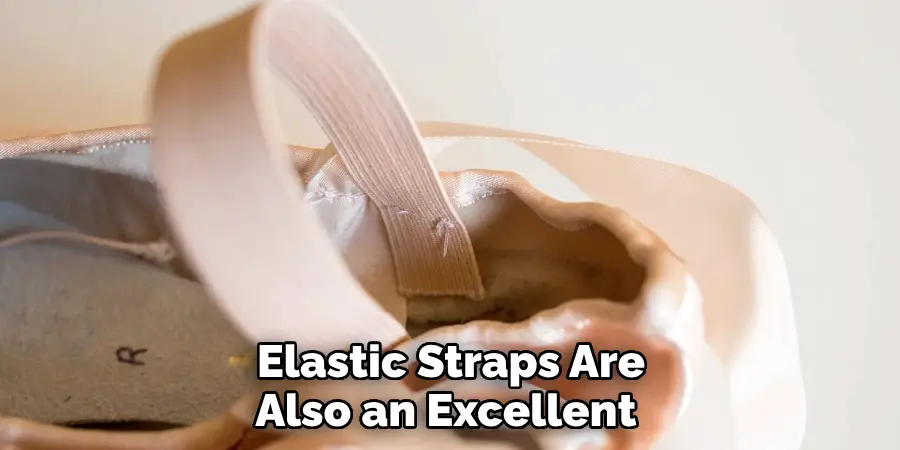
10. Elastic Straps
Elastic straps are also an excellent choice for fixing broken sandals since they provide plenty of stretchability while still providing enough support so that they won’t come apart easily once attached properly with either screws or rivets, depending on what type you have available at home (or purchase online). To use elastic straps for this purpose, simply cut two strips large enough so that they cover both sides where your sandal has become separated and then attach them securely onto each side using either screws or rivets, depending on what type of elastic straps you have available.
Things to Consider When Fixing Broken Sandals
Nothing is more frustrating than having your favorite pair of sandals break. Whether it’s a broken strap, sole, or buckle, there are a few things to consider when trying to fix them. Here are some tips to help you repair your broken sandals and get back to wearing them in no time.
- Assess the damage: The first thing you need to do is determine the extent of the damage. Look closely at where the sandal is broken and try to identify what needs to be fixed. This will help you come up with a plan for repairing it.
- Gather materials: Depending on the type of break, you may need different materials for repairing your sandals. Some common materials include glue, needle and thread, replacement straps or buckles, and a hammer.
- Clean the area: Before attempting any repairs, make sure to clean the area where the sandals are broken. This will ensure that the materials you use will adhere properly and provide a stronger hold.
- Use glue for minor breaks: For small breaks such as a detached sole or loose strap, using glue is usually the best option. Make sure to use a strong adhesive that is specifically designed for repairing shoes.
- Sewing for larger breaks: If the break is bigger, sewing may be necessary. Use a heavy-duty needle and thread, and make sure to sew as close to the original stitching as possible.
Common Mistakes to Avoid When Fixing Your Broken Sandals
Using the Wrong Tools
One of the most common mistakes people make is using the wrong tools for the job. It may seem like any tool that can cut or fasten materials will do, but using the wrong tools can actually damage your sandals further. Make sure to use tools specifically designed for repairing sandals, such as a leather punch, awl, or pliers.
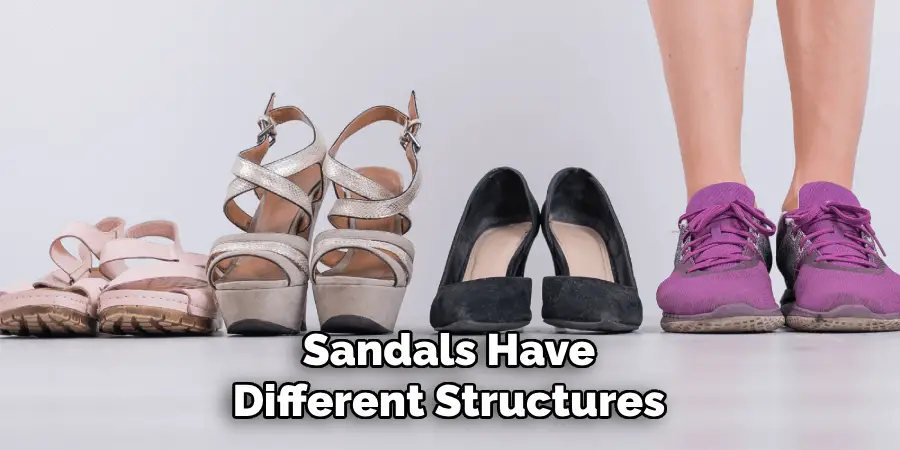
Not Understanding the Structure of Your Sandals
Before attempting to fix your sandals, it is important to understand its structure and how it is put together. This will help you determine the best approach in fixing the broken part and avoid causing any further damage. Different types of sandals have different structures, so make sure to do your research beforehand.
Rushing the Repair Process
Repairing sandals requires patience and attention to detail. Rushing the process can result in a poorly done repair job that may not hold up for long. Take your time in making precise cuts, attaching materials securely, and ensuring everything is aligned properly.
Conclusion
Now you have a better understanding of how to fix broken sandals. Whether the soles are worn, stitches need mending, or simple refreshes in components like the straps, there are easy and affordable options to get your sandals back in top shape. Even the most complicated damage can be undone by using items already found around the house and visiting a shoe repair shop with great success.
Ultimately, we all try to make sure our shoes provide us with optimal comfort and style throughout their lives – learning how to patch broken sandals or mend minor damage can prevent major headaches from buying new pairs each season and keep your wallets happy too! So go forth, use those handy skills you now know and put them into action so that you’ll have sandals that look presentable as ever!