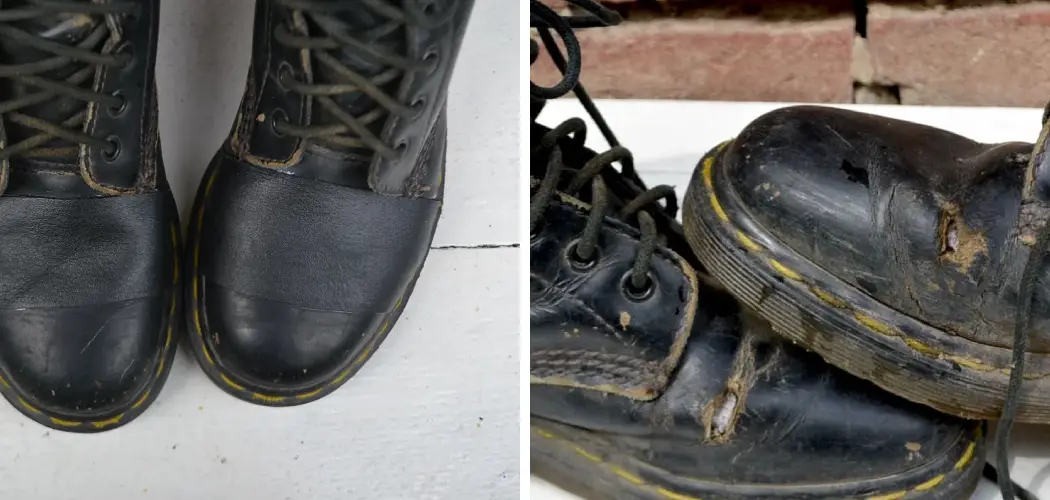
There’s nothing like the feeling of a fresh pair of leather boots. The way they mold to your feet and keep them warm on a cold day is simply magical. However, what happens when you get a cut in your boot? Do you have to toss them out and buy a new pair? Not at all! In this blog post, we’ll teach you how to fix a cut in leather boots to be as good as new. Read on for more information.

Summary: If you have a cut in your leather boots, you can use a few easy steps to help fix the issue. Start by cleaning the area with a damp cloth, followed by drying it off with a dry cloth. Next, apply some leather glue and press the edges together to hold them in place. Allow the glue to dry before wearing your boots again. Finally, you may want to apply a leather sealant or wax to protect the area from further damage.
Why Fix a Cut in Leather Boots?
There are a few reasons you might want to fix a cut in leather boots. First, if you don’t fix the cut, it could get worse and eventually lead to a bigger tear in the boot. Second, fixing the cut will help keep the boot in good condition and extend its life. And finally, fixing the cut can be a lot cheaper than buying a new pair of boots.
Required Materials
- a pair of leather boots with a cut
- a shoe repair kit
- scissors
- superglue
How to Fix a Cut in Leather Boots Step by Step Guide
Step 1: Cleaning
Before starting any repair work, you must clean the area around the cut. This will help remove any dirt or debris that could prevent the adhesive from bonding properly. You can use a mild soap and water solution to clean the area. Be sure to let the area dry completely before proceeding to the next step.
Step 2: Applying Adhesive
If the cut is small, you can try to fix it with adhesive. Apply a thin layer of adhesive to the cut and let it dry. If the adhesive is a good fit, the cut should be healed.
If the adhesive is not a good fit or if the cut is too large, you will need to take other measures.
Step 3: Cut the Scrap of Leather in The Shape
You will need to cut a scrap piece of leather that is big enough to cover the hole or tear. If the cut is large, you may want to use two leather pieces and overlap them. Once you have the right size and shape, trim any excess leather to even with the rest of the boot.
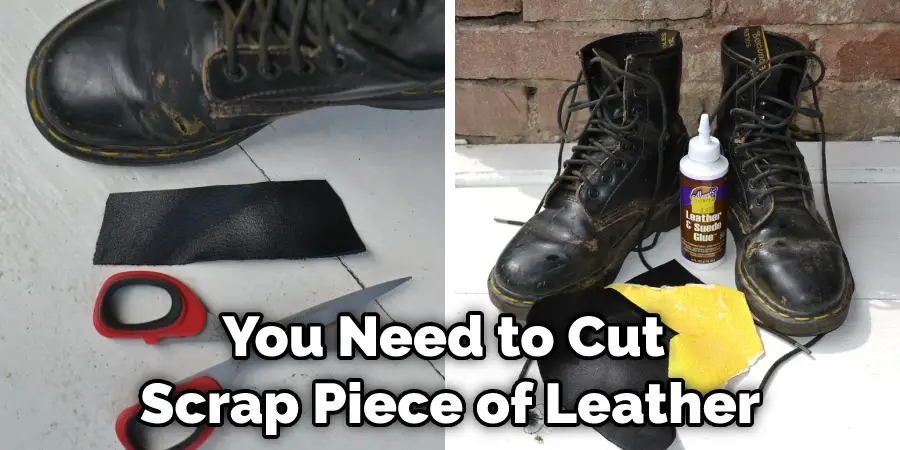
Step 4: Paste the Glue
With the help of a toothpick, apply a generous amount of glue to the cut. Try to keep the glue within the confines of the cut so that it doesn’t get on the rest of the boot. You want to use enough glue to place the patch over the top; it will be well secured.
Step 5: Place the Leather Scrap
Now it’s time to place the leather scrap over the cut. You’ll want to make sure that it is big enough to cover the entire cut and securely in place. Use a few small clamps or clothespins to hold it in place until it dries.
If you don’t have any leather scraps available, you can also use a small piece of cloth.
Step 6: Dry the Area
Once you’ve patched the hole, it’s time to dry the area. You can use a hairdryer on a low setting or set the boots in a warm, sunny spot. Ensure the area is completely dry before moving on to the next step.
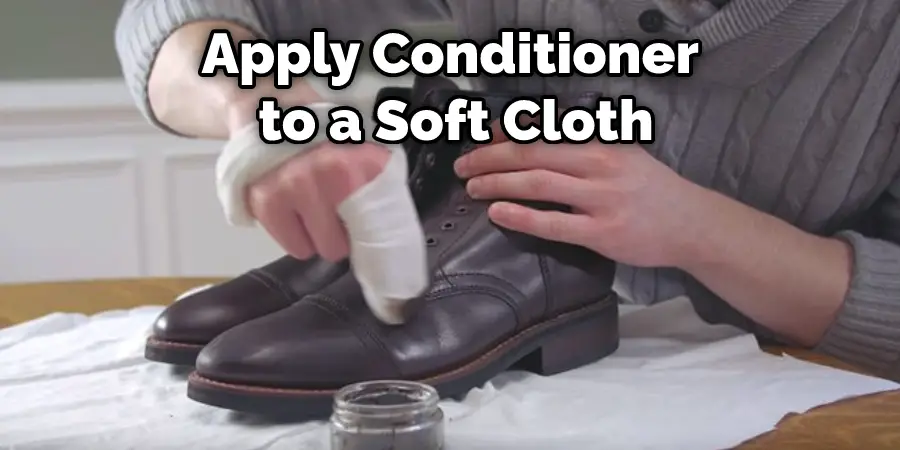
Step 7: Apply Leather Conditioner
A leather conditioner will help keep the leather soft and supple, and it will also help protect the leather from further damage. Apply a thin layer of conditioner to the repaired area, and then rub it in with your fingers. Let the conditioner dry completely before moving on to the next step.
Step 8: Finish Up
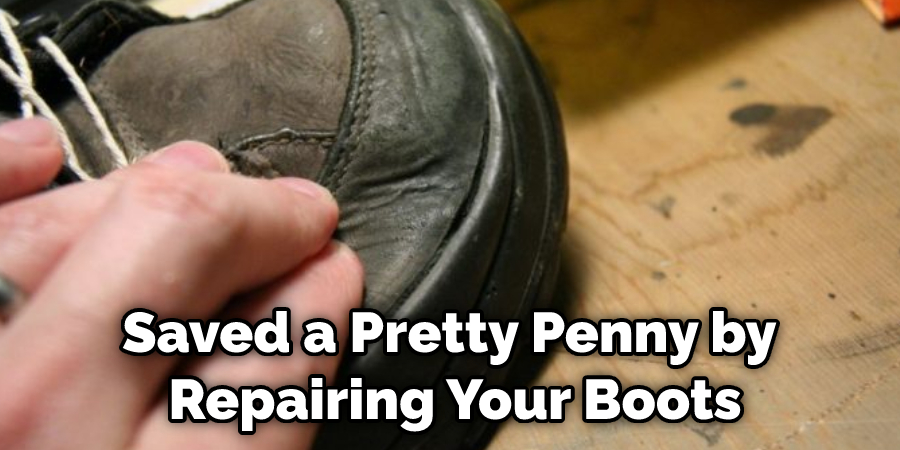
Assuming that you have followed all of the steps above, your cut should now be repaired! If it’s not perfect, don’t worry – it’ll only add to the character of your boots. Once you’re finished, enjoy knowing that you’ve saved yourself a pretty penny by repairing your boots rather than having to buy a new pair. If you want to know more about how to fix a cut in leather boots, keep reading.
How to Restore Dried out Leather Boots?
If your leather boots have seen better days and are starting to look dried out, you can restore them to their former glory with a few simple steps.
1. Coconut Oil for Dried-out Leather Boots
Coconut oil is a natural way to condition and restores leather. Simply rub a small amount of coconut oil into the leather, using circular motions, until it’s evenly distributed. You can also use a brush to work the oil into the leather.
2. Vinegar and Water for Dried-out Leather Boots
Mix equal parts white vinegar and water in a bowl. Soak a clean, soft cloth in the mixture and dry it, damp but not dripping. Rub the cloth over the dried-out areas of your boots until they’re wet. Then, let them air dry completely. Repeat this process once a week to help keep your leather boots hydrated and looking their best.
3. Mink Oil for Dried-out Leather Boots
If your boots are starting to look a little too dry, you can give them a quick treatment with some mink oil. This will help restore some of the moisture and make them look and feel softer. Just be careful not to use too much, or it will start to look greasy.
4. Beeswax for Waterproofing
Beeswax is a natural waterproofing agent that can be used on leather boots. Melt some beeswax in a pot over low heat, then apply it to the boots with a cloth. Be sure to rub it well to coat the entire surface. Let the wax dry completely, and then enjoy your newly waterproofed boots!
5. Leather Conditioner for Dried-out Leather Boots
If your boots have started to crack and the leather is feeling dry and stiff, you can revive them with a leather conditioner. Apply a small amount of conditioner to a soft cloth and rub it into the boots in a circular motion. Let the conditioner soak in for 10-15 minutes, then buff the boots with a clean cloth. Repeat this process once a month to keep your boots in good condition.
What Brings Leather Back to Life?
Step 1: Cleaning
You will need a cloth, saddle soap, and water. Wet the cloth with some saddle soap mixed with water and wipe the leather boots down. Be sure to get all of the dirt and grime off of them.
Step 2: Conditioning
Once the boots are clean, take another cloth and wet it with some leather conditioner. Rub the conditioner into the leather and let it soak in.
Step 3: Buffing
After the conditioner has soaked in, take a buffing cloth (or an old t-shirt will do) and buff the boots until they are shiny.
Step 4: Apply Boot Cream
Now it’s time to apply a boot cream. This will help to protect the leather and keep it looking its best. Apply a small amount of cream to a cloth and rub it into the boots. Keep reading for more information about how to fix a cut in leather boots.
You Can Check It Out to Make Boot Shaft Narrower
How Can I Prevent My Leather Boots from Getting Wet When It Rains?
If you’re caught in a rainstorm, there’s not much you can do to prevent your leather boots from getting wet. However, you can do a few things to minimize the damage. First, if possible, try to walk on sidewalks or paths rather than through puddles of water.
Second, if your boots get wet, stuff them with newspaper to help absorb the moisture and then let them dry naturally at room temperature. Finally, treat your leather boots with a waterproofing spray or cream before wearing them in rain or snow.
You Can Check It Out to Refinish Leather Boots
Frequently Asked Question
What Happens if I Leave My Boots Outside Overnight in The Rain?
Leather is a natural material that is susceptible to damage from the elements. If you leave your boots outside in the rain overnight, the leather will absorb water and swell. The next morning, you may find that your boots are misshapen and uncomfortable to wear. To fix this problem, you will need to re-wet the leather and allow it to dry slowly and evenly.
How Do You Know if Your Leather Boots Are Broken or Just Damaged?
There are a few ways to tell if your leather boots are broken. One way is to check the soles. If they’re coming apart, then the boots are broken. Another way to tell is by how the leather feels. If it’s cracked or brittle, the boots are most likely broken. Finally, you can try to bend the boots. If they fold easily, then they’re likely broken.
Can You Repair Split Leather Boots?
There are a few ways that you can repair split leather boots. The easiest way is to use shoe glue. You can also use a stitch and sealant or use superglue.
If you’re using shoe glue, you’ll want to make sure that the surface is clean and dry. Apply a thin layer of glue to both surfaces and let them dry for about 24 hours.
Is There a Glue for Leather?
There are a few different types of glue that can be used to fix a cut in leather boots. A leather adhesive, contact cement, or superglue can be used to fix the cut.
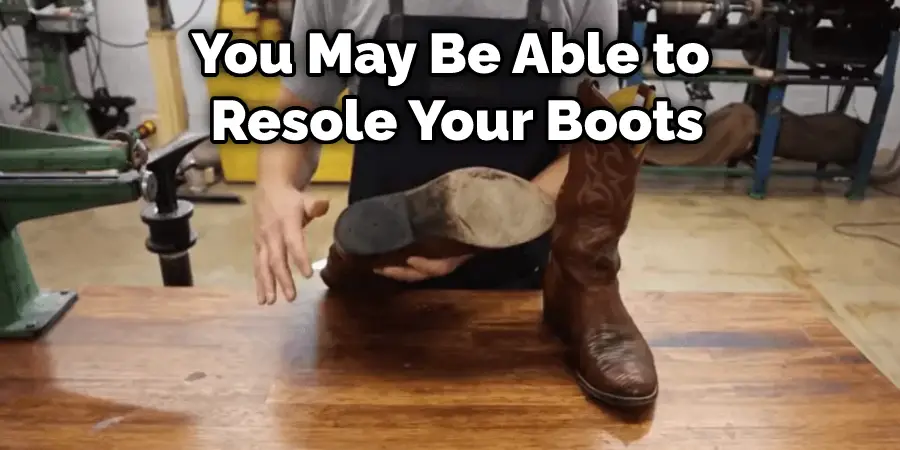
Can I Resole My Boots?
There is no definitive answer to this question as it depends on the boots and the level of damage. In some cases, you may be able to resole your boots by taking them to a cobbler or shoemaker. However, in other cases, the level of damage may be too severe, and resoling the boots will not be an option.
Conclusion
Boots are a staple in any man’s wardrobe. A good pair of boots can last for years with the proper care. If you find yourself with a cut or tear in your leather boots, don’t worry, we’ve got you covered. This article will show you how to fix a cut in leather boots using just a few simple tools and supplies. So pull out your trusty boots, and let’s get started!
You May Also Read: How to Protect Gucci Leather Shoes