
Birkenstock is a popular brand known for its comfortable and supportive sandals. They are known for their unique contoured footbed that molds to the shape of your feet, providing maximum comfort for everyday wear.

However, over time, the cork footbed may lose its shape or become worn out. In such cases, it’s important to know how to change Birkenstock footbeds to maintain the comfort and support that the brand is known for.
Why Change Birkenstock Footbeds
Birkenstock footbeds are made of natural cork, which can wear out over time due to constant pressure and moisture from wearing them. This can result in a flat or uncomfortable footbed, which may lead to foot pain or discomfort. Additionally, if the footbed is worn out, it may not provide the necessary support for your feet and can cause strain on your joints.
Necessary Items
Before changing your Birkenstock footbeds, make sure you have the following items:
- Replacement Footbeds: You can purchase replacement footbeds directly from Birkenstock or from authorized retailers. Make sure to get the right size and style for your sandals.
- Screwdriver: Most Birkenstock sandals have a small screw on the side that holds the footbed in place. You will need a screwdriver to remove this screw.
- Small Brush or Toothbrush: This will be used to clean the footbed and sandals before inserting the new footbed.
12 Steps on How to Change Birkenstock Footbeds
Step 1: Clean the Sandals
Before removing the old footbed, make sure to clean the sandals thoroughly. Use a small brush or toothbrush to remove any dirt or debris from the footbed and straps. Let them dry completely before proceeding to the next step.
Step 2: Locate the Screw
Flip your sandals over to locate the screw that holds the footbed in place. It is usually located on the inner side of the sandal, near where your arch would be. Also, make sure to have a small container nearby to keep the screw in a safe place while you change the footbed.
Step 3: Remove the Screw
Using a screwdriver, gently remove the screw from the sandal. Make sure to keep it in a safe place, as you will need it later when inserting the new footbed. Keep in mind that some Birkenstock models may have more than one screw, so make sure to remove all of them.

Step 4: Take Out the Old Footbed
Once the screw(s) is removed, gently lift and slide out the old footbed from your sandals. Be careful not to damage the cork or leather while doing this. Soaking the sandals in warm water for a few minutes can help soften the leather and make it easier to remove the footbed.
Step 5: Clean the Sandal Footbed Area
After removing the old footbed, use a damp cloth or brush to clean any debris or residue from the sandal’s footbed area. Also, make sure to dry it completely before proceeding further. If there is a layer of dried adhesive, gently scrape it off with a razor blade.
Step 6: Insert the New Footbed
Take the new footbed and insert it into your sandals. Make sure to align it properly so that the toe grip on the footbed sits between your first and second toes. The arch support should also align with your natural arch.
Step 7: Check the Fit
Before securing the footbed, step into your sandals to check if it fits comfortably. If not, you may need to adjust or trim the footbed slightly to ensure a perfect fit. Even the slightest discomfort can lead to foot pain, so take your time with this step.
Step 8: Secure the Footbed
Once you are satisfied with the fit, replace the screw(s) that you removed earlier. Make sure to tighten them securely but not too tight, as it could damage the sandals. Then, press down on the footbed to make sure it is firmly in place.
Step 9: Clean and Dry
Use a damp cloth or brush to clean any excess adhesive from around the edges of the footbed. Then, let your sandals dry completely before wearing them again. This will ensure that the new footbed is securely in place.

Step 10: Break-in Period
Keep in mind that your new footbed may feel a bit stiff at first. This is normal, and it will take some time for the cork to mold to the shape of your feet again. It’s recommended to wear them for short periods initially and gradually increase the time as they break in.
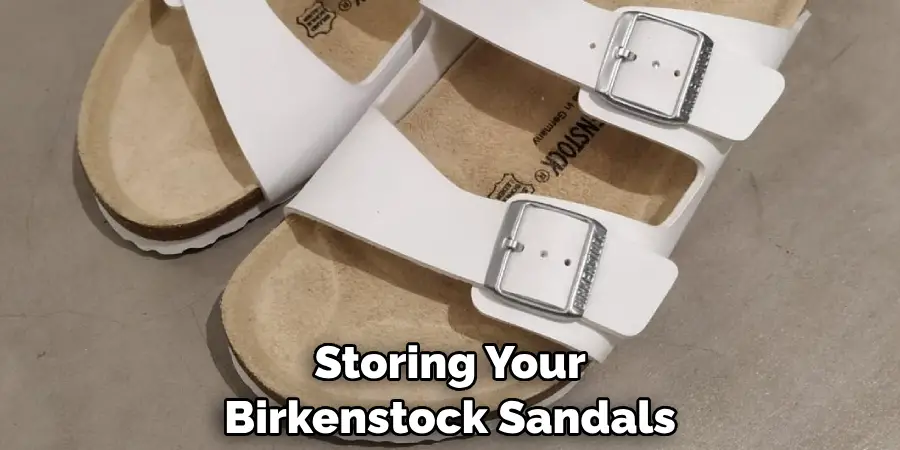
Step 11: Store Unused Footbeds Properly
If you have any leftover footbeds, make sure to store them in a cool, dry place away from direct sunlight. This will ensure that they maintain their shape and durability until you need to use them again.
Step 12: Replace Regularly
It’s important to note that Birkenstock footbeds should be replaced every 1-2 years, depending on frequency of use and wear. This will ensure that you always have a comfortable and supportive footbed for your sandals.
Knowing how to change Birkenstock footbeds is essential for maintaining the comfort and support of your favorite sandals. With these simple steps, you can easily replace worn-out footbeds and continue to enjoy the benefits of Birkenstock sandals for years to come.
Remember to always clean and dry your sandals properly before inserting new footbeds, and enjoy the comfort of your newly refreshed Birkenstock sandals! So next time you notice your Birkenstock footbeds have lost their shape or become worn out, don’t hesitate to follow these steps and give your feet the support they deserve.
9 Safety Measures to Follow When Changing Footbeds
While changing your Birkenstock footbeds is a relatively simple process, it’s important to follow some safety measures to avoid any accidents or damage. Here are 9 safety tips you should keep in mind:

1) Make Sure to Wear Proper Footwear
Before changing your footbeds, make sure to wear proper footwear, such as closed-toe shoes or sandals with a sturdy sole. This will protect your feet from any potential injury while handling the screwdriver.
2) Use Caution When Handling Tools
When using a screwdriver, be mindful of your surroundings and use caution to avoid any accidents. Hold the screwdriver firmly, and be careful not to slip or damage the sandal while removing the screw.
3) Keep Screws in a Safe Place
As you remove the screws, make sure to keep them in a small container or pouch. This will prevent them from getting lost or accidentally knocked over, which can cause damage to your sandals. However, be sure to keep the container away from children and pets.
4) Avoid Using Excessive Force
When removing or inserting the footbed, avoid using excessive force as it can damage the cork or leather. Instead, use gentle pressure and take your time to ensure a successful change of footbeds. If you encounter any resistance, re-evaluate your approach and try again.
5) Clean the Footbed Area Properly
Before inserting the new footbed, make sure to clean the area thoroughly. This will help the footbed adhere properly and prevent any discomfort or potential hazards caused by debris or residue. As mentioned earlier, soaking the sandals in warm water can make this step easier.
6) Use Safety Gloves
If you have sensitive skin or are prone to allergies, it’s a good idea to wear safety gloves while handling the footbeds. This will protect your hands from any potential irritants and ensure a safe and comfortable experience.
7) Always Trim the Footbed Carefully
If you need to trim the footbed to fit your sandals, make sure to do it carefully and avoid any jagged edges. This will not only ensure a comfortable fit but also prevent potential injuries or discomfort caused by sharp edges.

8) Take Your Time
Changing footbeds can be a delicate process, so it’s important to take your time and go through each step carefully. Rushing through the process can lead to mistakes or accidents, so give yourself enough time and avoid distractions.
9) Read and Follow Instructions
Lastly, always make sure to read and follow any specific instructions provided by Birkenstock for changing footbeds. This will ensure that you’re using the correct technique and avoiding any potential risks or damages.
By following these safety measures on how to change Birkenstock footbed, you can change your Birkenstock footbeds without any worries and continue to enjoy the comfort and support of your favorite sandals. Remember, taking proper care of your footbeds is essential for maintaining the overall quality and longevity of your Birkenstock sandals.
8 Things to Avoid When Changing Footbeds
While it’s important to follow safety measures when changing your Birkenstock footbeds, there are also some things you should avoid to ensure a successful and stress-free process. Here are 8 things to keep in mind:
1) Don’t Rush
As mentioned earlier, rushing through the process can lead to mistakes or accidents. Take your time and go through each step carefully to avoid any potential issues or damages. Some things are worth taking the time for, and this is one of them.
2) Don’t Use Sharp Objects
Avoid using any sharp objects, such as knives or scissors, to remove the old footbed. Not only can this potentially damage your sandals, but it can also cause harm to yourself. Stick to using a screwdriver or other recommended tools provided by Birkenstock.
3) Don’t Force the Footbed In
If you encounter resistance while trying to insert the new footbed, don’t force it. This can cause damage to the sandal or footbed and lead to an uncomfortable fit. Instead, reassess your approach and try again with gentle pressure.
4) Don’t Leave Any Debris Behind
Before inserting the new footbed, make sure to thoroughly clean the area to avoid any discomfort or potential hazards. Leaving debris behind can also prevent the footbed from adhering properly and affect its overall performance.

5) Don’t Ignore Instructions
Always make sure to read and follow any specific instructions provided by Birkenstock for changing footbeds. Ignoring these instructions can lead to improper installation and potentially damage your sandals or footbeds.
6) Don’t Trim Too Much
If you need to trim the footbed to fit your sandals, be careful not to trim too much. This can affect the overall support and comfort of your Birkenstock sandals. It’s always better to trim a little at a time and try on the sandals before making any further adjustments.
7) Don’t Neglect Your Safety
Your safety should always be a top priority, so don’t neglect it when changing footbeds. Follow the recommended safety measures and use caution when handling tools or sharp objects to avoid any accidents or injuries.
8) Don’t Forget to Enjoy Your New Footbeds
Changing your Birkenstock footbeds may seem like a daunting task, but it’s worth the effort. Once you’ve successfully changed them, take the time to enjoy the added comfort and support they provide. You deserve it!
Remember, by avoiding these things and following proper safety measures, you can change your Birkenstock footbeds with confidence and continue to enjoy the benefits of your favorite sandals.
8 Additional Tips for Maintaining Your Birkenstock Footbeds
Now that you know how to safely change your footbeds, here are 8 additional tips for maintaining them and ensuring they provide long-lasting comfort and support:
1) Regularly Clean Your Footbeds
It’s important to regularly clean your footbeds to prevent any buildup of dirt or debris. This will not only keep them looking nice, but it also helps maintain their overall quality and performance.
2) Avoid Excessive Exposure to Heat
Excessive exposure to heat can cause the footbeds to dry out and potentially crack. When not wearing your Birkenstock sandals, store them in a cool and dry place away from direct sunlight or heat sources.
3) Store Them Properly
When storing your Birkenstock sandals, make sure to properly store the footbeds as well. This will help maintain their shape and prevent any damage or deformation. So make sure to keep them in a cool and dry place, preferably with the straps open.
4) Use Cork Sealant
To protect the cork material of your footbeds, use a cork sealant every few months. This will help prevent any moisture from seeping into the cork and potentially damaging it. Again, make sure to store your sandals and footbeds in a dry place after applying the sealant.
5) Avoid Water Exposure
While Birkenstock sandals are known for being water-resistant, it’s still important to avoid excessive exposure to water. Wearing them in heavy rain or submerging them in water can affect the overall quality of the footbeds and straps.
6) Use Footbed Refresher
If your footbeds start to develop an odor, use a footbed refresher to neutralize any odors and keep them smelling fresh. This is especially important if you wear your sandals without socks. As always, make sure to let the footbeds dry completely before wearing them again.
7) Replace When Necessary
Even with proper maintenance, footbeds will eventually wear out and need to be replaced. Keep an eye on the condition of your footbeds and replace them when they start to lose their shape or support.
8) Follow Birkenstock’s Warranty Guidelines
Birkenstock offers a warranty for its products, including footbeds. Make sure to follow their guidelines and contact them if you encounter any issues with your footbeds. This can help ensure that you receive proper assistance or replacements if needed.
By following these additional tips on how to change Birkenstock footbed, you can maintain the quality and longevity of your Birkenstock footbeds and continue to enjoy the comfort they provide. Remember, proper care leads to happy feet! Keep these tips in mind, and enjoy your Birkenstock sandals for years to come.
Frequently Asked Questions
How Often Should I Change My Birkenstock Footbeds?
Birkenstock recommends changing your footbeds every 4-6 months, depending on the frequency of wear. If you notice significant wear or loss of support before then, it may be time to change them sooner.
Can I Make My Own Footbeds?
While some people may try to make their own footbeds, it’s not recommended. Birkenstock footbeds are designed specifically for their sandals and provide the best support and comfort. Making your own footbeds may not have the same effect and can potentially damage your sandals.

Should I Change Both Footbeds at the Same Time?
It’s recommended to change both footbeds at the same time to ensure consistent support and comfort for both feet. However, if one footbed is significantly more worn than the other, it may be necessary to only replace that one. Always assess the condition of both footbeds before making a decision.
Can I Use Any Replacement Footbeds for My Birkenstock Sandals?
It’s best to use Birkenstock replacement footbeds specifically designed for your sandals. These are made with the same high-quality materials and provide the best fit and support. Using other brands or generic footbeds may not have the same effect and could potentially damage your sandals. It’s always best to stick with the brand’s recommended replacements.
Conclusion
Changing your Birkenstock footbeds may seem daunting, but it’s ultimately worth the effort for the added comfort and support. Remember to follow safety measures on how to change Birkenstock footbed and avoid common mistakes, as well as regularly maintain your footbeds for long-lasting use.
By taking care of your footbeds, you’ll continue to enjoy the benefits of your favorite Birkenstock sandals for years to come. If you have any questions or concerns about changing your footbeds, always refer to Birkenstock’s guidelines or contact their customer service for assistance.