
Are you looking to improve your running or cycling performance? Then, check out how to tie a no-show shoe lace knot! This knot is perfect for keeping your shoe snug on your feet without having laces flapping in the wind. Plus, it’s easy to learn and quick to tie! Read on for step-by-step instructions.

What is a No-Show Shoe Lace Knot?
A no-show shoe lace knot is a type of knot that secures your shoe laces without having any excess hanging out. This type of knot is popular among runners and cyclists, as it provides a streamlined look while also keeping the laces from getting tangled or caught on anything. It’s also great for casual wear, especially with slip-on shoes.
You may have also heard this knot referred to as a “surgeon’s knot” or a “double knot”, but ultimately they all achieve the same goal of keeping your laces hidden and secure.
Why Tie a No-Show Shoe Lace Knot?
There are several reasons why you might want to tie a no-show shoelace knot. First, this knot keeps your shoe snug on your feet without having laces flapping in the wind. This is perfect for runners and cyclists who want to avoid distractions and stay focused on their performance. Second, this knot is easy to learn and quick.
Needed Materials:
A Pair of Shoes With Laces:
This is obvious, but make sure you have a pair of shoes with laces! Ideally, choose a pair of running or cycling shoes for this type of knot as they tend to have longer laces.
Flat Laces:
To achieve the no-show look, it’s important to use flat laces instead of round ones. Round laces can be used, but they won’t lay as flat and may not stay hidden as well.
How to Tie a No-Show Shoe Lace Knot Step-by-Step Guide
Step 1: Take the Shoelace:
If you are wearing shoes with laces, take the left shoelace in your left hand and the right shoelace in your right hand. Cross the laces in the middle, and hold them together between your hands. It’s important to make sure that the laces are even on both sides. The amount of excess lace on each side should be the same.
Step 2: Make a Small Knot:
After creating a loop on one side, take the other side and make a small knot in the middle. This will help keep the loops together. Hold both hands in the air like you are surrendering. Next, take the left side and make a loop. Now, take the right side and put it over the loop. It’s important to make sure the right side is longer than the left.
Step 3: Place Your Finger Inside the New Knot’s Opening:
You can place your finger inside the new knot’s opening to help keep it together as you tighten it. This will also help you ensure that the knot is tight and secure against your shoe. It’s important to keep the knot close to your shoe while tightening it so that it stays hidden. You can also use your other hand to hold the knot in place.
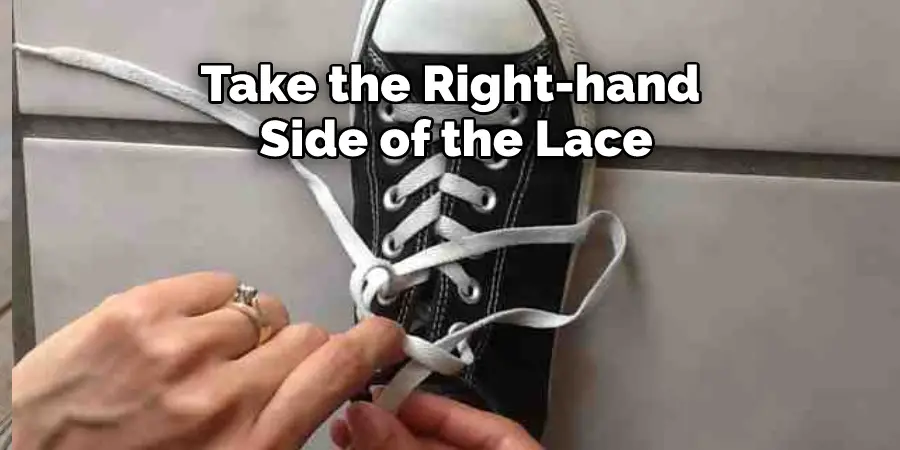
Step 4: Take the Right-Hand Side:
Take the right-hand side of the lace and put it over the left-hand side. Now, take the left-hand side and put it over the right-hand side. This will create a new knot with both laces. You can also tighten the knot at this point by pulling on both sides. But be careful not to pull too tight as you might end up with a lopsided knot. It’s important to maintain the initial positioning of the laces throughout this step.
Step 5: Now Put the Left-Hand:
Now put the left hand over the right hand and hold it there. Next, take the right-hand lace and go over the top of the left-hand lace. Now, take the left-hand lace and put it under the right-hand lace. Now, poke it up through the hole. This will form two loops. It’s important to maintain the initial positioning of the laces throughout this step.
Step 6: Tighten It Up
Now that the knot is complete, take the time to tighten it up by pulling on both ends of the laces. Be careful not to pull too hard, or you may have an uneven knot. Once the knot is tight, cut off any excess lace and tuck in the ends. Voila! You have successfully tied a no-show shoelace knot! But don’t worry if it takes a few tries to get it right; practice makes perfect.
Step 7: Now You Have a No-Show Shoelace!
After following these simple steps, you now have a no-show shoelace knot! This is a great way to keep your shoes looking neat and tidy without dealing with laces. Plus, it’s a great way to prevent shoe slippage. So whether you’re heading to work or out for a night on the town, this knot will come in handy!
No-show shoelaces can be a lifesaver when you want to wear shoes without socks but don’t want your laces showing. Unfortunately, it can be tricky to tie a no-show knot correctly, but with this simple step-by-step guide, you’ll be able to do it in no time!
Some Other Lacing Techniques:
Another lacing technique that can be used to prevent shoelaces from coming undone is called the “no-show” knot. This knot is a variation of the basic knot and can be used on most types of shoes. To tie the no-show knot, follow these steps:
1. Criss-Cross Lacing:
This is the most common method of lacing shoes. It is a simple criss-cross pattern that can be used on most types of shoes. To do this, start by threading one lace diagonally across the other lace halfway up the shoe. Then, bring the second lace under the first lace and pull it up. Next, crisscross the laces over each other and tuck them underneath the loops on the opposite side. Finally, pull the laces tight and tie a knot.

2. Straight Lacing:
This is probably the most common way to lace shoes, and it’s very simple. You go straight across from one hole to the next. This method is good for everyday use because it’s very sturdy. To do this, start by threading the left lace through the right hole and the right lace through the left hole. It will create horizontal lines across the shoe. The laces will then go up and down through the holes until they are tied at the top.
3. The Army Method:
This is a more difficult method, but it’s also the most secure. Make a loop with one of the laces, then make another loop with the other laces and place it over the first. Take the end of the “over” lace and tuck it behind the “under” lace. Hold on to the ends of both laces and pull tight. You’ve now tied the Army Method shoelace knot!
4. Hiking & Biking Lacing:
This lacing is similar to the previous one but uses a different method for securing the loops. After you have laced the shoe, take a left “over” loop and tuck it up and behind the right “over” loop. Now, poke it out in front of the right “over” loop. Next, take a left “under” loop and do the same thing, tucking it behind the right “under” loop and poking it out in front of the right “under” loop. Finally, pull on all four loops to tighten the knot.
5. Lace Knot:
This is probably the simplest way to tie your laces together, but it’s also one of the most effective. First, take the left lace and make a small loop, then take the right lace and put it over the top of the left lace. Now, take the right lace and make a small loop, then put the left lace over the top of the right. Finally, pull both loops tight, and you’re done!
6. Italian Corkscrew:
This knot is perfect for securing a shoelace around a shoe eyelet. It is similar to the basic knot but wraps the lace twice around the eyelet for a more secure hold. If you want to know more about how to tie a no-show shoe lace knot, keep reading. We’ll teach you how to tie this knot and some other useful lacing techniques.
7. One-Handed Shoe Lace Knot:
The one-handed knot is a quick and easy way to tie your shoelaces when you’re on the go. To do this, simply grab both laces and cross them over each other. Next, make a loop with one of the laces, then tuck the other lace around that loop and pull tight. This will create a secure knot with just one hand. It’s perfect for those busy mornings when you’re rushing out the door!
8. Double Knot:
This is a simple and effective way to prevent your shoelaces from coming untied during physical activities like running or playing sports. To double knot your laces, tie a regular knot and then make a second knot on top of it. This will secure the initial knot in place and prevent it from coming undone. Just remember to keep an eye out for any wear and tear on your laces, as they may need to be replaced if they become too worn or frayed.
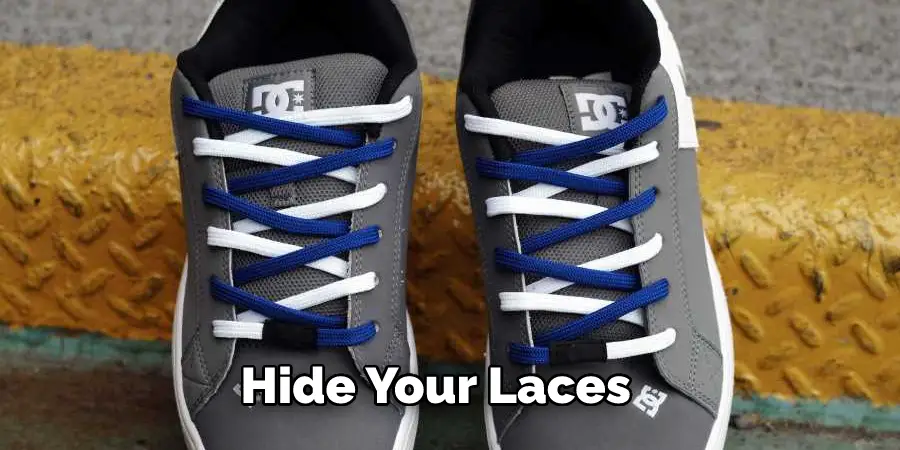
Other Methods You Can Use To Hide Your Laces:
You can use other methods to hide your laces, some of which are more effective than others. One method is to take a piece of fabric or tape and wrap it around the top of your shoe, just below the laces. This will help to keep the laces in place and hidden from view. You can also tuck the laces inside the shoe if there is space. This will help keep them from being seen and from getting tangled up.
If you are looking for a more permanent solution, you can purchase lace covers or concealers. These are small pieces of fabric or plastic that fit over the laces and hide them from view. They come in various colors and styles, so you can find one that will match your shoes.
No-show laces are a great way to keep your laces hidden from view and prevent them from getting tangled up. They are easy to use and come in various colors and styles. You can purchase them online or at your local sporting goods store. Keep reading for more information about how to tie a no-show shoe lace knot.
Do You Need to Take Help From Others?
While tying a no-show shoelace knot is relatively simple, some people may have difficulty doing it on their own. If you are struggling, don’t be afraid to ask for help! You can ask a friend or family member to demonstrate the knot for you or watch tutorials online. With practice and patience, you’ll be able to tie the perfect no-show shoelace knot on your own in no time.
It may also be helpful to invest in a shoelace-tying aid, which can assist you in tying your laces with one hand or if you have limited dexterity. These tools are especially useful for those who may have trouble bending down to tie their shoes.
You can also experiment with different lacing techniques and knots to find what works best for you and your shoes. Just remember to have fun and be creative! With these tips, you’ll never have to worry about tangled or unsightly shoelaces again. Happy lacing!
Additional Tips:
- Make sure to choose the right length for your no-show laces. They should be long enough to tie a knot, but not too long that they will show.
- Experiment with different lacing techniques to find which one works best for you and your shoes.
- If you have trouble tying the no-show knot, try using a pair of tweezers or a small stick to help guide the laces through the loops.
- Always make sure your shoes are tied securely before engaging in physical activities, especially ones that involve a lot of movement or running.
- Replace your laces regularly to avoid any accidents or injuries caused by worn or frayed laces.
- Have fun with different colored no-show laces to add a pop of color to your shoes and make them stand out.
Remember, there are many methods for tying shoelaces and hiding them from view. Find the one that works best for you and keep your shoes looking neat and stylish. Happy lacing! Good luck on your no-show shoelace-tying journey!
Frequently Asked Question
How Do You Secure Laces Without a Tie?
There are a few different ways to do this. One way is to take the ends of the laces and tie them together in a knot. Another way is to tuck the ends of the laces into the shoe.
Can I Hide My Shoelaces?
There’s no need to worry if you’re not a fan of tying knots in your shoelaces. You can tuck them into the shoe. This is also a good option if you have untied shoelaces and don’t want them to become undone while wearing the shoes.
How Do I Tighten My Shoelace?
If you find that your shoelaces are too loose, you can tighten them by following these simple steps:
1. Take the two laces in your left hand and cross them over the laces in your right hand.
2. Take the lace in your right hand and put it over the lace in your left hand.
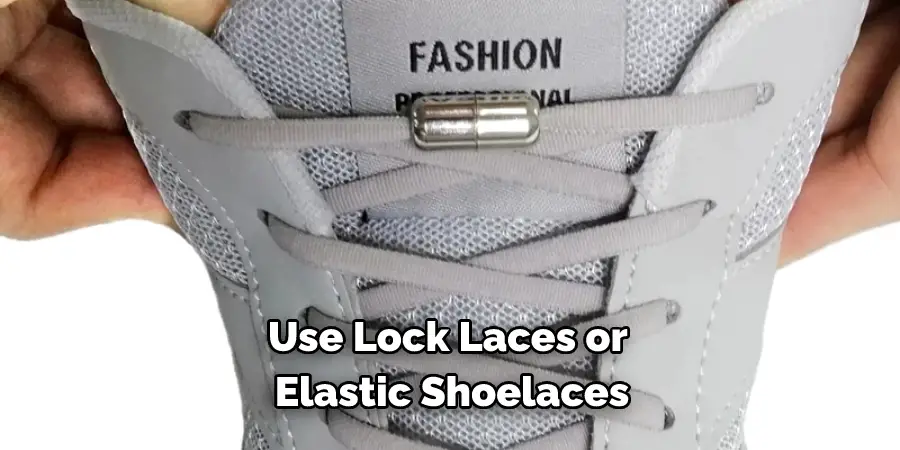
How Do I Prevent Shoelaces From Slipping?
There are a few ways to prevent your shoelaces from slipping. One way is to tie a no-show shoelace knot. This knot is very easy to tie and will keep your laces in place. Another way to keep your laces from slipping is to use lock laces or elastic shoelaces. These laces stay tight and will not loosen over time. Finally, you can also use tape or a rubber band to keep your laces. Please choose the method that works best for you and stick with it!
Do You Tie the Laces on Jordans?
Yes, the traditional way to tie Jordans is by using a “loop-and-lock” knot. This involves threading one lace over the other and then pulling it tight. To ensure the knot stays secure, some people will tuck the end of the laces into the shoe’s tongue before tying them off.
Conclusion Paragraph:
Now that you know how to tie a no-show shoe lace knot, there’s no reason to be held back by uncomfortable and ill-fitting shoes. We hope you found this tutorial helpful. If you have any questions or feedback, please let us know in the comments below.
You Can Check It Out to How to Lace Running Shoes for Flat Feet
You Can Check It Out to Can You Wear Boots With Joggers