Have you ever wanted to own a custom pair of cowboy boots but felt too expensive? Well, you’re in luck! In this blog post, we’ll show you how to reshape cowboy boots at home. We’ll take a detailed look into the techniques and materials required for giving your footwear an individualized touch. From widening or narrowing them down to raising or lowering shafts – whatever style changes you desire – our step-by-step guide covers you.
Reshaping cowboy boots may sound intimidating, but with the right tools and patience, you can achieve a perfect fit that complements your style.
With just some basic tools and supplies, along with these tips from our team of experts, breathing new life into old leather can be easier than ever before!
What Will You Need?
Before starting the process, ensure you have all the necessary tools and materials. You will need:
- Cowboy boots (obviously!)
- Leather conditioner or saddle soap
- Newspaper or a towel
- A spray bottle with water
- Reshaping supplies such as stretchers, wooden dowels, etc.
Once you have gathered all these items, you are ready to begin reshaping your cowboy boots.
10 Easy Steps on How to Reshape Cowboy Boots
Step 1: Clean Your Boots
Start by wiping your boots with a damp cloth to remove dirt or debris. If your boots are extremely dirty, use a leather conditioner or saddle soap to clean them thoroughly. Allow the boots to dry completely before moving on to the next step.
Step 2: Stuff Your Boots
To reshape the shaft of your boots, you will need to stuff them with newspaper or a towel to give them some structure. This will help prevent the boots from collapsing while reshaping and allow you more control over the process. You can also stuff the foot section of your boots with wooden dowels to stretch them out.
Step 3: Wet Your Boots
Using a spray bottle, dampen the leather of your cowboy boots. This will make it easier to manipulate and reshape. Ensure not to soak the boots completely, as this could cause damage.
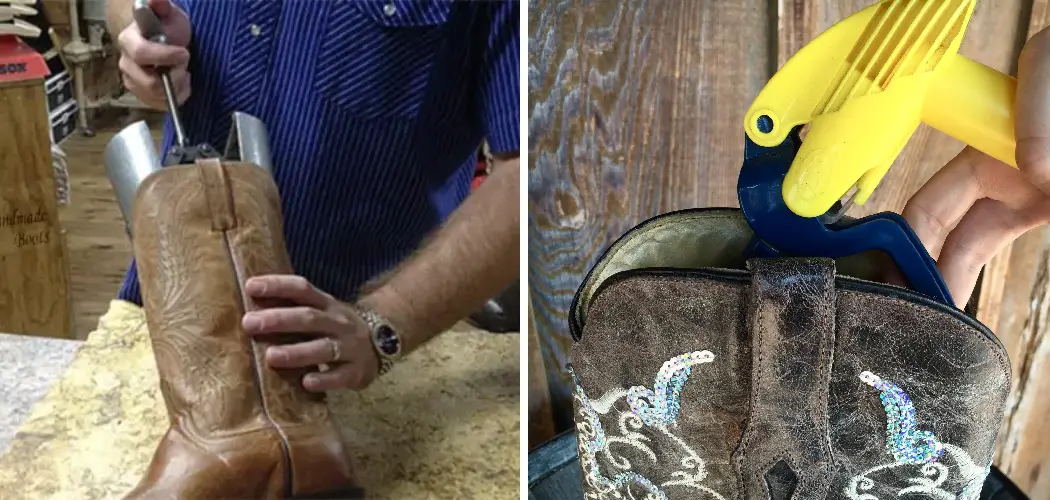
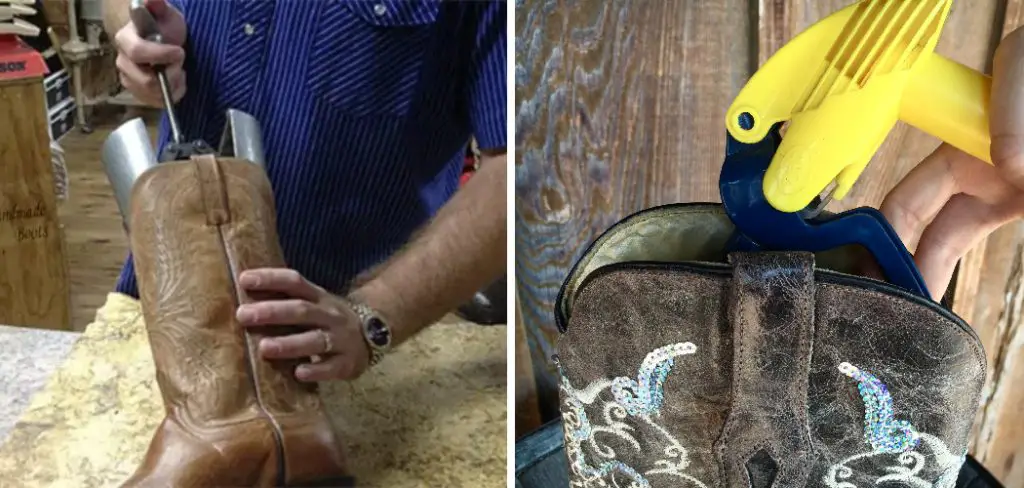
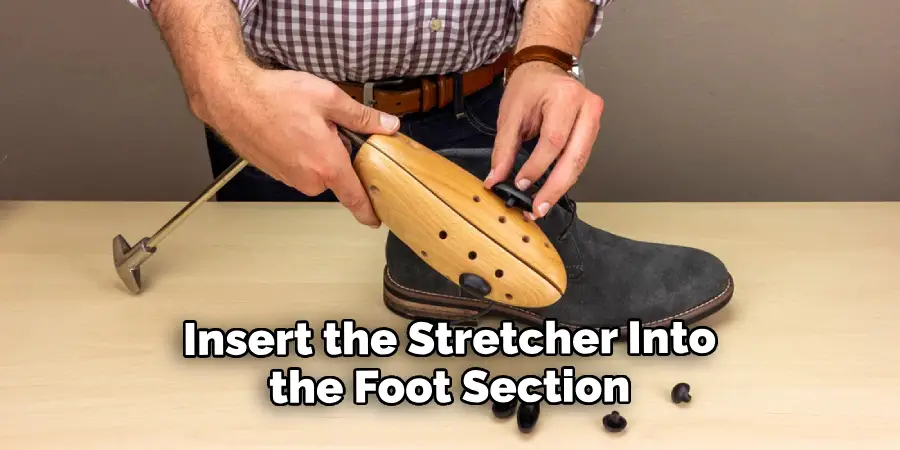
Step 4: Reshape Your Boots
While the leather is still damp, start reshaping your boots. If you want to widen the boots, insert the stretcher into the foot section. Ensure it’s adjusted to a larger size than your foot to initiate stretching. To raise the shaft, pull it upwards gently, and for lowering, press it downwards.
If you want to narrow down your boots, use clamps along the areas where you want the squeeze. Remember to reshape slowly and gently to avoid causing any damage to the boots. Allow the boots to dry naturally after you’re done reshaping. Do not use any heat source as it may crack the leather.
Step 5: Check Your Progress
After the boots have completely dried, remove the stuffing and try them on to check the new shape. Walk around a bit to ensure they feel comfortable and look how you intended. If the boots have not achieved your desired shape or size, you may need to repeat the previous steps. Remember, it is better to reshape gradually rather than forcing a bigger change in a single session. Patience is key when reshaping cowboy boots.
Step 6: Condition Your Boots
After you’ve achieved the desired shape, it’s crucial to condition your boots. Reshaping can be tough on the leather; applying a leather conditioner can help restore its natural oils. Apply a liberal amount of conditioner or saddle soap on a cloth and rub it onto your boots.
Make sure to cover all areas of the leather. This step helps to prevent the leather from drying out or cracking, maintaining the longevity and quality of your boots. Leave the boots to absorb the conditioner before moving on to the next step.
Step 7: Polish Your Boots
Once the conditioner has been fully absorbed, it’s time to polish your boots to restore their shine. Choose a polish that matches the color of your boots. Apply a small amount of the polish to a clean cloth and rub it onto the leather in circular motions. Make sure to cover all areas, paying special attention to any scratches or scuffs. After applying the polish, buff the boots with another clean cloth until they shine. This enhances the look of your boots and adds an extra layer of protection.
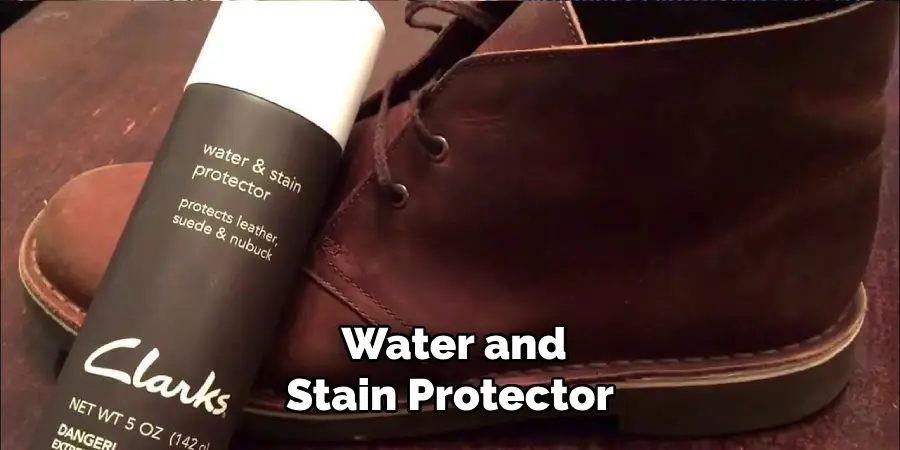
Step 8: Protect Your Boots
Consider applying a water and stain protector to ensure the reshaped boots retain their new form and continue looking great. This step is crucial, especially for those living in wet or snowy climates. Spray the protector evenly over the boots, ensuring all areas are covered. Let them dry completely before wearing them. This protector protects against water and stains, keeping your boots in their best condition for longer.
Step 9: Wear Your Reshaped Boots
Now that your boots are reshaped, conditioned, polished, and protected, it’s time to show them off! Wear your boots regularly to help them maintain their new shape. Remember, leather boots conform to the shape of your foot over time, so the more you wear them, the better they’ll fit.
Step 10: Regular Maintenance
Reshaping your cowboy boots isn’t a one-time job. Regular care and maintenance are key to preserving their shape and extending their lifespan. Repeat the conditioning and polishing process every few weeks, and always ensure your boots are clean and dry before storing them. Taking these steps will ensure your reshaped cowboy boots continue to look great and feel comfortable.
By following these ten easy steps, you can easily reshape your cowboy boots and achieve the perfect fit. Whether you’re looking to raise or lower the shaft widen or narrow the foot section, with a bit of patience and the right tools, you can customize your boots to complement your personal style.
5 Additional Tips and Tips

- Patience is Key: Reshaping cowboy boots takes a lot of work; it requires time and patience. Avoid rushing the process, as it could cause damage to the boots. Allow them to dry naturally after applying moisture; this will help the leather to relax and gradually change shape.
- Invest in Boot Stretchers: Boot stretchers are an excellent tool for reshaping cowboy boots. They come in various sizes and can be adjusted to fit the desired shape of your boots. A boot stretcher will help stretch out tight areas and make the reshaping process easier.
- Use Heat with Caution: While heat can be useful for reshaping leather, it can also cause damage if not used correctly. Avoid direct heat sources such as a hairdryer or heat gun, which can dry out and crack the leather. Instead, use indirect heat by placing boots near a heat source like a radiator or heater.
- Consider Professional Help: If you need more clarification about reshaping your cowboy boots, it is best to seek professional help. Professional cobblers have the knowledge and experience to reshape boots properly without causing damage. They also have specialized tools that can make the process easier.
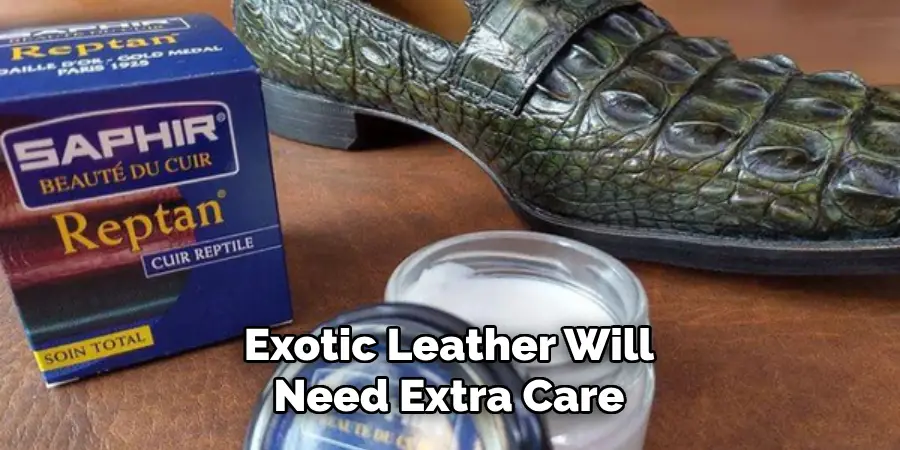
- Be Mindful of the Material: Different materials require different approaches when reshaping cowboy boots. For example, suede or exotic leather will need extra care and attention compared to regular cowhide leather.
With these additional tips, you can confidently reshape your cowboy boots and achieve the desired fit and look.
5 Things You Should Avoid
- Overstretching: Avoid attempting to stretch the boots more than half a size. Overstretching may damage the boots and make them uncomfortable to wear.
- Using Chemical Stretchers: While chemical solutions are available that promise to loosen leather, these can be harsh and may damage the boots. It’s better to stick with manual stretching or natural water-based methods.
- Ignoring Discomfort: If the boots are causing discomfort or pain, don’t continue to wear them in the hope that they’ll stretch naturally. Ignoring pain can lead to foot problems.
- Forcing the Fit: Don’t force your foot into a too-tight boot. This could hurt your foot and strain the seams of the boot, causing premature wear and tear.
- Neglecting Regular Maintenance: Remember to condition and care for your boots regularly once you’ve achieved the desired shape and fit. This will keep the leather supple, maintain the shape, and extend the life of your cowboy boots.
Avoiding these common mistakes can ensure the best results when reshaping your cowboy boots. Whether for a better fit or to revive an old pair, with patience and proper technique, you can reshape your cowboy boots like a pro.
Conclusion
With these tips in mind, it’s now easier than ever to reshape your boots for a great fit. Remember, every boot is different, so adjusting the shape may take a bit of experimenting to get it just right. But once you’ve learned how to reshape cowboy boots properly, you’ll see that the reward is worth the effort – they’ll look and feel like new!
Hopefully, the article on how to reshape cowboy boots has provided you with valuable information and guidance. Use these tips and techniques to give your boots a new lease on life and continue enjoying their timeless style for years.
Be sure to share your experiences with us by posting a review or commenting on our blog so other boot enthusiasts can benefit from your knowledge. Let’s keep learning and working together to find the perfect pair of cowboy boots!