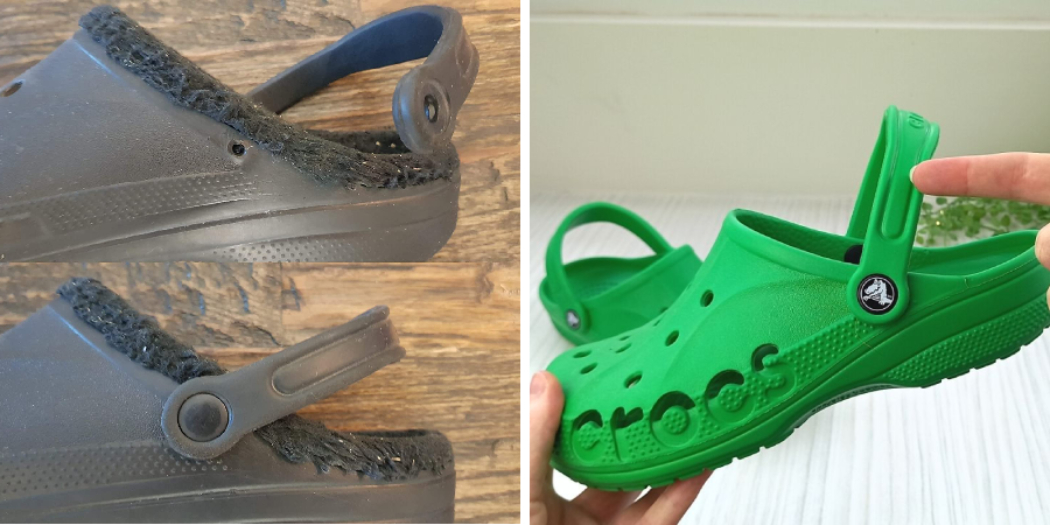
Crocs are popular shoes, but the rivets tend to fall off. If you’re a fan of Crocs, you know that the shoes have rivets in the rubber soles. Over time, those rivets can come loose and your shoes can start to fall apart.
Here’s how to fix crocs rivets. Note: You’ll need a small Phillips head screwdriver for this project.

Summary: To fix Crocs rivets, remove the old one, pry it off, and clean the area around the hole. Then, apply glue and insert the new rivet. When in place, add some super glue to the shoe and let it dry. You’ll then need to trim excess rivet before testing out the new rivet.
Why Do Crocs Rivets Come Loose?
The reason the rivets come loose is that they’re only held in place with a small amount of adhesive. That’s not enough to keep them in place forever, especially if you wear your Crocs often. The good news is that it’s an easy fix.
Can You Fix Crocs Rivets?
Yes, you can fix Crocs rivets! It’s a quick and easy process that anyone can do at home. All you need are some materials that you probably already have around the house.
Necessary Materials for Fixing Rivets Crocs
- Small Phillips head screwdriver
- Super glue
- Rivets (can be purchased at a hardware store)
What do You need to Fix Crocs Rivets?
- Crocs shoes with loose or missing rivets
- Replacement rivets (can be found at most shoe stores or online)
- Hammer
- Anvil (or something similar that can act as an anvil, such as a block of wood)
- Screwdriver (optional)
10 Steps on How to Fix Crocs Rivets
1. Remove the Old Rivet:
Use your screwdriver to remove the old rivet. Be careful not to damage the shoe. You can use a screwdriver by gently twisting it back and forth until the rivet pops out. Then pull it out the rest of the way with your fingers. Make sure to remove the entire rivet, including the base.
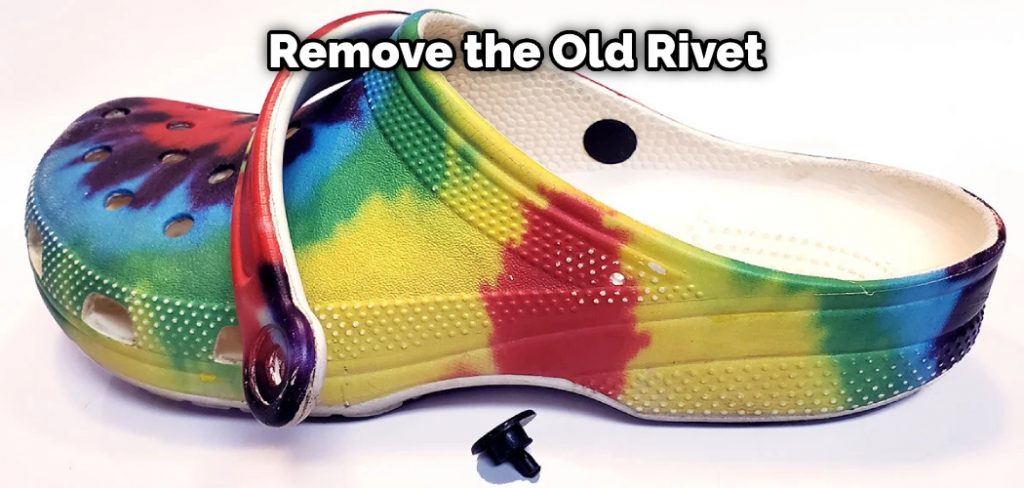
2. Pry Off the Old Rivet:
Use your screwdriver to pry off the old rivet. Be careful not to damage the Croc in the process. If the crocs are damaged, it will be difficult to glue on a new rivet.
3. Clean the Area Around the Hole:
Use a cotton swab or your finger to clean the area around the hole. This will help the new rivet adhere better. This step is important, so don’t skip it!
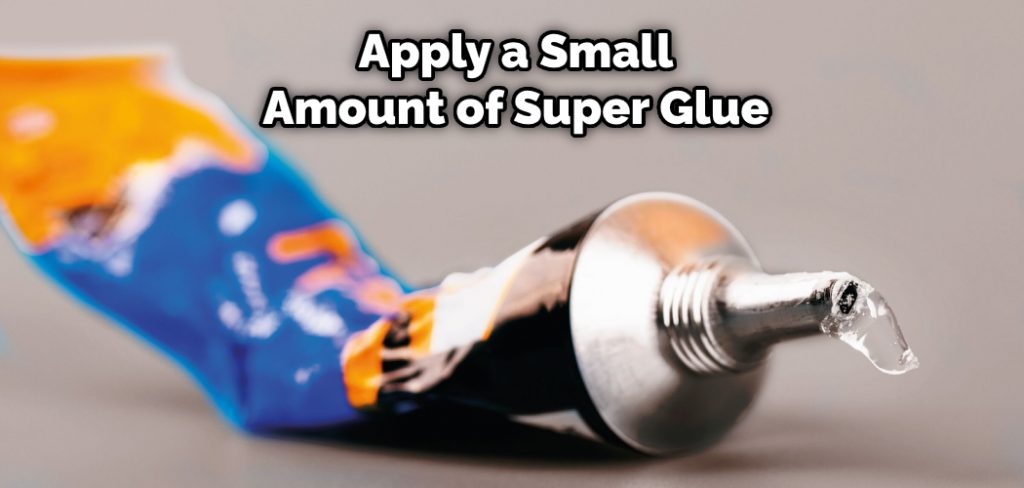
4. Apply Glue:
Apply a generous amount of glue to the base of the new rivet. You want there to be enough glue so that it seeps into any cracks or crevices. This will help to create a stronger hold.
5. Insert the New Rivet:
You can insert the new rivet by hand or with the help of pliers. If you’re using pliers, make sure that you don’t apply too much pressure. You don’t want to damage the Croc.
You Can Also Check It Out to Fix Crocs Flip Flops
6. Hold the Rivet in Place:
Use your finger or a cotton swab to hold the rivet in place until the glue dries. Be careful not to touch the glue, as it can be difficult to remove from your skin. If you touch the glue, you can try using nail polish remover to remove it.
7. Apply Super Glue to the Shoe:
Apply a small amount of super glue around the rivet. This will help keep it in place. You have to be careful not to use too much glue, as it can damage the Croc. If glue is put on your croc, clean it with nail polish remover.
8. Let the Glue Dry:
Let the glue dry for 24 hours. You can dry the glue by setting the Croc in a sunny spot or using a hair dryer. you can also use a UV light to speed up the drying process.
9. Trim Excess Rivet:
Use your scissors to trim any excess rivet that is sticking out. You want the rivet to be level with the rest of the shoe. If it’s not, it can rub against your foot and cause discomfort.
10. Test the Rivet:
Once the glue is dry, test the rivet to make sure it’s secure. If the rivet is still loose, you can try repeating steps 7-9. And that’s it! You’ve successfully fixed your Crocs rivets.
Now you can enjoy your fixed Crocs! No more loose rivets! Enjoy Your Fixed Crocs!
Precautions You Need While Fixing:
- Firstly, you will need to check the size and shape of your rivet. This is because there are different types of rivets that can be used for fixing Crocs.
- Next, you will need to clean the area around the rivet. This is important because you want to make sure that the area is free of dirt and debris before you start fixing.
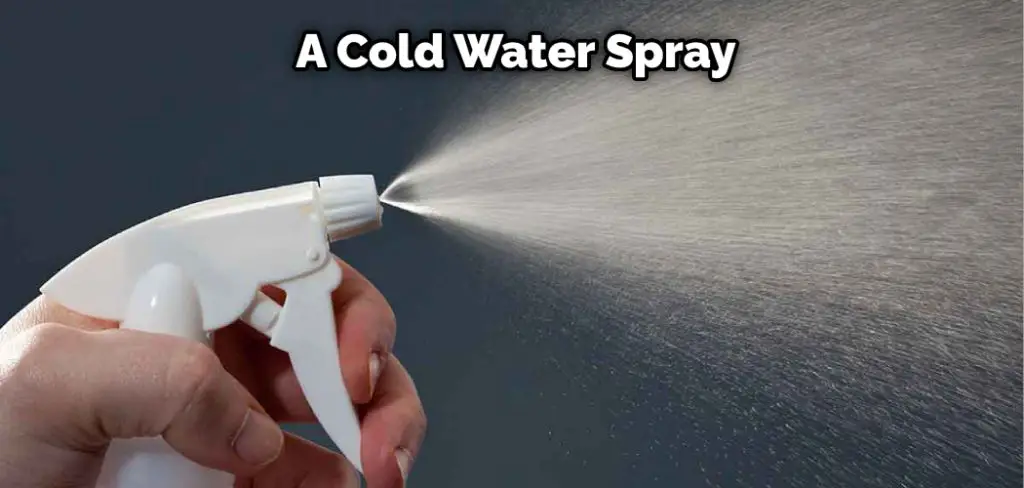
- Once you have cleaned the area, you will need to apply some heat to the rivet. This will help to melt the plastic and make it easier for you to push the rivet through the material.
- Finally, you will need to cool the rivet down. You can do this by using a cold water spray or a cold air blower.
If you follow these steps, you should be able to fix your Crocs rivets easily.
What should You Do, If Your Rivet is Brocken?
If your rivet is broken, you have a few options. You can either replace the rivet, or you can try to repair it.
If you decide to replace the rivet, you will need to purchase a new one from a Crocs retailer or online store. You will also need to remove the old rivet and insert the new one in its place.
If you decide to try to repair the rivet, you will need a Crocs repair kit. The kit includes a rivet tool and replacement rivets. To use the repair kit, follow the instructions included in the kit.
Few Things You Should Keep In Mind
- The first thing you need to do is get a screwdriver that fits the size of the rivets on your Crocs.
- Next, take a look at the back of the Croc and locate the two holes where the rivets are located.
- Now, take your screwdriver and insert it into one of the holes.
- Once the screwdriver is in the hole, twist it in a clockwise direction until you feel the rivet loosen up.
- Repeat this step for the other rivet and then remove both of them from the back of the Croc.
- Now, take a look at the holes where the rivets were located and see if they are still in good shape.
- If the holes are still in good shape, then you can proceed to the next step.
- If the holes are not in good shape, then you will need to get a new pair of Crocs.
- Now, take the new pair of Crocs and locate the two holes on the back of the shoe.
- Insert the rivets into the holes and twist them in a clockwise direction until they are tight.
Frequently ask questions
Is Fixing Rivets Crocs Time Consuming?
The time it takes to fix rivets on Crocs shoes depends on the number of rivets that need to be replaced. If only a few rivets are coming loose, the repair can be quick and easy. However, if multiple rivets are coming loose, it may take a bit longer to fix them all.
Do Croc Rivets Come Apart?
The rivets on Crocs shoes are designed to be permanent. However, over time, the rivets may become loose and come apart. If this happens, you can follow the steps above to fix them.
How Do You Fix Worn Crocs?
If your Crocs are starting to show wear, you can try some of the following tips to prolong their life:
- Brush away dirt and debris with a soft brush.
- Clean them with warm water and soap.
- Apply a thin layer of petroleum jelly to protect the material from further wear.
- Store them in a cool, dry place when not in use.

Is Worn Crocs Returnable?
Unfortunately, Crocs does not accept returns on worn shoes. However, you may be able to exchange them for a new pair if they are still under warranty.
When Should I Replace My Crocs?
While Crocs are designed to be durable, they will eventually need to be replaced. How often you need to replace your Crocs depends on how often you wear them and how well you take care of them. Generally speaking, you should expect to replace your Crocs every 6-12 months.
The following tips can help you prolong the life of your Crocs
- Brush away dirt and debris with a soft brush.
- Clean them with warm water and soap.
- Apply a thin layer of petroleum jelly to protect the material from further wear.
- Store them in a cool, dry place when not in use.
Conclusion
If the rivets on your Crocs shoes are coming loose, don’t worry! You can easily fix them by following the steps in this article. Just be sure to purchase a new rivet from a Crocs retailer or online store before you begin. With a little bit of effort, you’ll have your Crocs looking like new in no time!
Hopefully, this article has helped you learn How to Fix Crocs Rivets. If you have any questions or comments, please feel free to leave them below!