You’re not alone if you have ever worn a pair of shoes and noticed that the soles were starting to come apart. Many people find themselves in this predicament, especially if they wear the same shoes day after day. Fortunately, there is a way to fix this issue without purchasing a new pair of shoes. In this article, we’ll discuss can molded shoe soles be repaired. Keep reading to learn more.

Shoe soles are typically made from either rubber or synthetic materials. Over time, these materials can break down and become brittle. This can cause the soles to separate from the shoes, especially if they are constantly exposed to moisture or heat.
Summary: Molded shoe soles are an excellent option for those who want a long-lasting, comfortable fit. However, it’s important to note that molded shoe soles can’t be fully repaired if they become damaged. The materials used in their production make them difficult to repair, and any attempts at doing so could potentially cause further damage.
A Detailed Guide on Can Molded Shoe Soles Be Repaired
Molded shoe soles are famous among modern shoe designs. They are generally made from various materials, including plastic, rubber, and leather. The soles can be molded to fit the shape of the wearer’s feet and give extra support. They are also durable and long-lasting. However, there may come a time when you need to repair your molded shoe soles. Here is a detailed guide on how to do so.
What You’ll Need to Repair Molded Shoe Soles?
- Shoe repair adhesive
- Rubber cement
- Paper towels
- Masking tape
- Scissors
- Sandpaper
- Clean rags
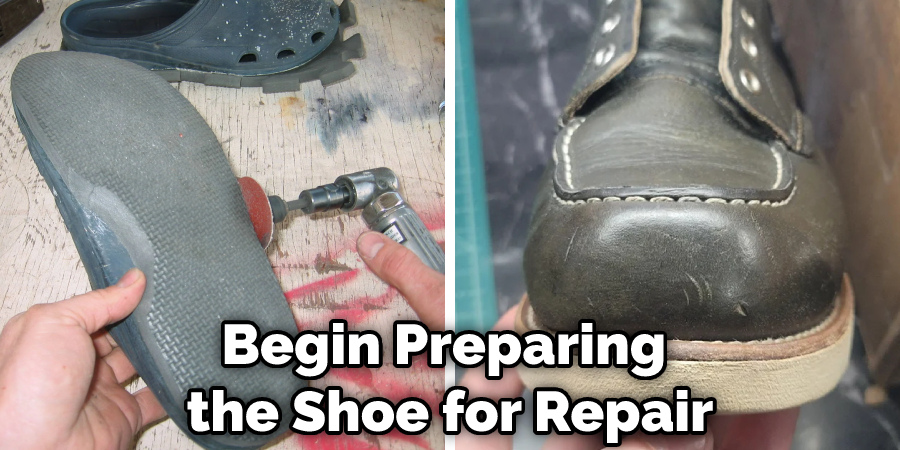
Step 1: Determine the Severity of the Damage
The first step to repairing a molded shoe sole is determining the severity of the damage. For example, if the sole is only slightly cracked or chipped, it can likely be fixed with some simple repairs. However, if the damage is more severe, such as a large hole or tear, the sole may need to be replaced entirely.
Step 2: Preparing the Shoe for Repair
Once you have determined the severity of the damage, you can begin preparing the shoe for repair. If you are using shoe repair adhesive, clean the surface around the hole with a paper towel. If you are using rubber cement, you will need to sand down the surface around the hole to create a Rough surface for the adhesive to adhere to.
Step 3: Remove any Loose Pieces of Rubber
If any large pieces of rubber have come loose from the soles of your shoes, you will need to remove them before continuing. This can be done using a small pair of scissors or a knife. Be very careful not to cut yourself in the process. Once the loose pieces have been removed, you can move on to the next step.
Step 4: Repair any Cracks or Chips
If your molded shoe soles have any cracks or chips, you’ll want to repair them before proceeding. Otherwise, the adhesive won’t be able to adhere to the soles properly, and the repair will be less durable.
To repair cracks or chips in your molded shoe soles, you’ll need:
- A sharp knife
- A putty knife
- Epoxy resin
- Fiberglass cloth
- Sandpaper
First, use a sharp knife to clean out dirt or debris from the cracks or chips. Then, use the putty knife to apply epoxy resin to the cracks or chips. Next, lay a fiberglass cloth over the top of the epoxy resin and press it down into place. Finally, use sandpaper to smooth out the surface of the repair. Allow the epoxy resin to cure for 24 hours before wearing the shoes.
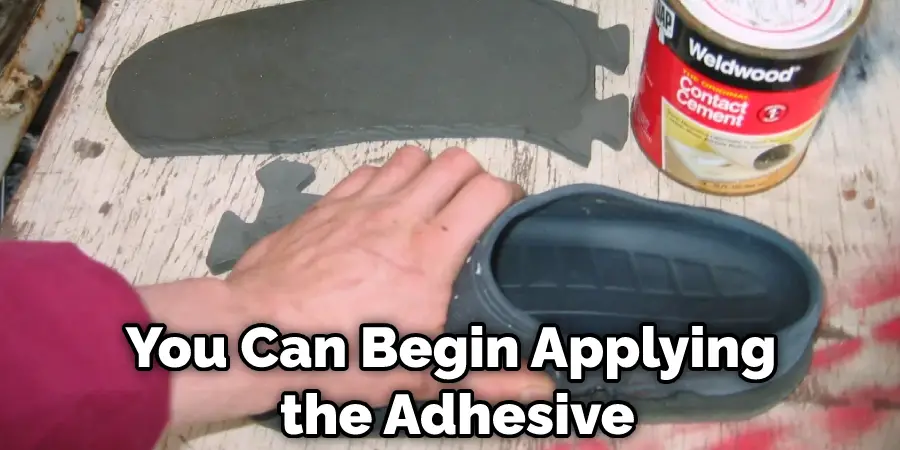
Step 5: Applying the Adhesive
Once the shoe has been prepared, you can begin applying the adhesive. If you are using shoe repair adhesive, apply a generous amount around the hole and press the two rubber pieces together. If you are using rubber cement, apply a generous amount of adhesive to both surfaces that will be joined together. Allow the cement to dry for about 30 minutes before proceeding.
Step 6: Press the Pieces Together
Once the adhesive has been applied, you can press the two rubber pieces together. If you are using shoe repair adhesive, press the two pieces firmly together and hold for about 30 seconds. If you are using rubber cement, you will need to use masking tape to hold the two pieces together while the cement dries. Allow the cement to dry for about 30 minutes before removing the masking tape.
Step 7: Finish Sanding the Repair
Once the adhesive has dried, you can finish sanding the repair. Using shoe repair adhesive, use fine-grit sandpaper to smooth out any rough patches. If you are using rubber cement, use medium-grit sandpaper to smooth out the surface of the repair. Be sure to sand in the same direction as the original molded soles.
Step 8: Cleaning up the Repair Area
Once you have successfully repaired the shoe sole, it is essential to clean up the repair area, so it is not visible. Use a brush or a cloth to remove any excess adhesive or material from the shoe’s surface. If necessary, use a damp cloth to clean the area. Allow the shoe to dry completely before wearing it.
It is possible to repair molded shoe soles if they become damaged or worn. By following these simple steps, you can fix the shoe yourself and avoid purchasing a new pair.
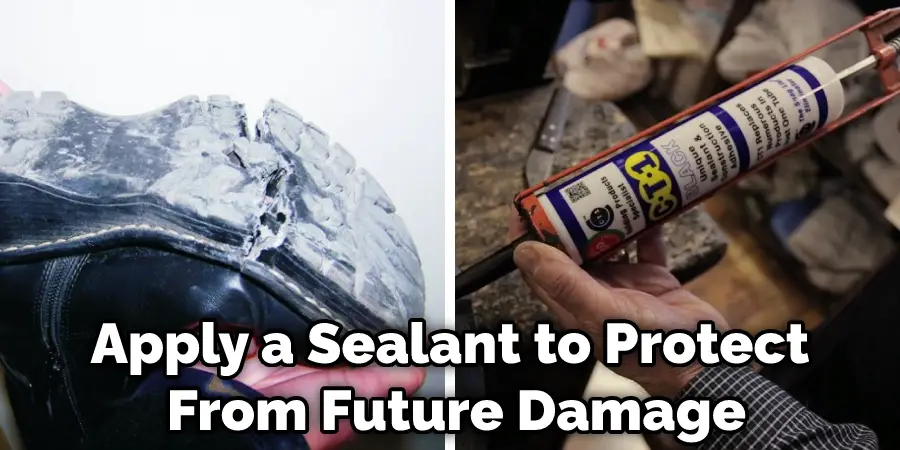
Step 9: Applying a Sealant
Once the repair has been completed, you may want to apply a sealant to protect it from future damage. For example, a sealant can help keep the adhesive or cement from cracking or peeling.
There are many different types of sealants available, so be sure to read the instructions carefully before applying. Most sealants need to be used several times for maximum protection. Allow the sealant to dry completely before wearing the shoes.
Step 10: Finishing Up
Now that the shoe sole has been successfully repaired, it’s essential to clean up the repair area, so it is not visible. Use a brush or a cloth to remove any excess adhesive or material from the shoe’s surface. If necessary, use a damp cloth to clean the area. Allow the shoe to dry completely before wearing it.
It is possible to repair molded shoe soles if they become damaged or worn. By following these simple steps, you can fix the shoe yourself and avoid purchasing a new pair.
Step 11: Repeat steps as needed
If additional repairs are needed, repeat the same steps as required. Be sure to allow enough time for the adhesive or cement to dry completely before wearing the shoes. These steps will help you in can molded shoe soles be repaired.
Tips and Warnings
Tips:
- If the damage is more extensive, or if you don’t have the time or inclination to repair them yourself, you can take them to a professional cobbler.
- Be sure to ask around for a reputable one, as not all cobblers are created equal. A good cobbler will be able to fix your soles in a jiffy and for a fraction of the cost of buying new shoes.
- If your shoes are particularly valuable or hard to come by, it might be worth taking them to a specialty shoemaker. They’ll likely charge more than a regular cobbler, but they’ll also be able to do a better job repairing your shoes.
Warnings:
- Don’t try to fix your shoes if you’re not confident in your abilities. You could end up making the damage worse.
- Don’t use superglue or other household adhesives to fix your soles. They might hold for a little while, but they’re likely to come apart again quickly.
- If you take your shoes to a cobbler, be prepared to pay for their services. Cobbler repairs aren’t usually cheap.
What Shoes Cannot Be Resoled?
Resoling is the process of repairing the sole of a shoe. It is usually done when the sole has worn down to the point where it is no longer effective. There are a few different ways to do this, but the most common is to glue a new sole onto the old one. This can be done with either synthetic or natural materials.
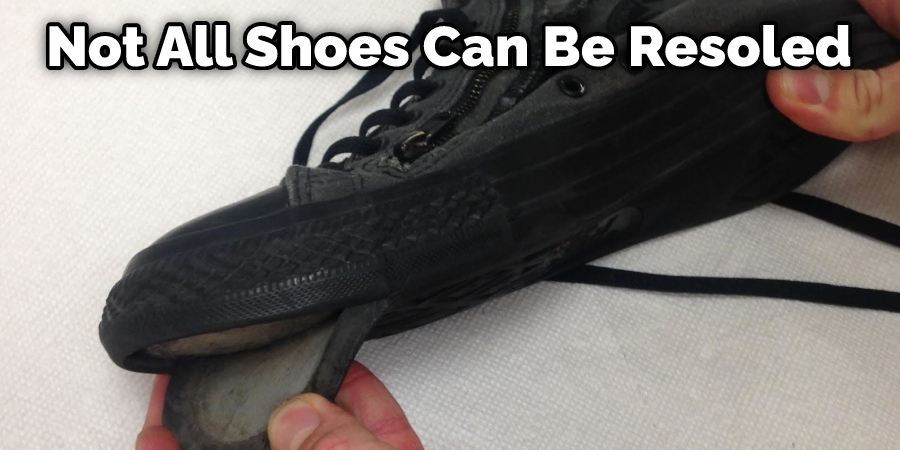
However, not all shoes can be resoled. Shoes with molded soles, for example, cannot be repaired in this way. The soles on these shoes are developed specifically to the shoe’s shape and cannot be replaced without damaging the shoe itself. If the soles on your molded shoes wear out, you will need to replace them entirely.
Fortunately, however, molded shoes are typically quite durable and will last for many years before they need to be replaced. So if you take good care of them, they should easily last you a decade or more.
You Can Check It Out to Care for Leather Soles
Is It Worth Resoling Shoes?
The average lifespan of a shoe is about 500 miles. Once you’ve hit that mileage marker, the shoes are typically considered worn out and in need of replacement. However, there are some cases where it’s possible to repair shoes – even if they’re molded soles.
Molded soles are famous because they’re lightweight and provide excellent traction. However, they’re also more challenging to repair than traditional soles. So if you have a pair of shoes with molded soles and they start to wear down, it’s best to take them to a professional cobbler for repair.
If you’re on a budget or don’t live near a cobbler, there are a few things you can try to extend the life of your shoes. One option is to apply a thin layer of adhesive to the worn areas of the soles. You can also try using a shoe repair kit to fix small tears or holes in the soles.
Conclusion
Can molded shoe soles be repaired? Yes, molded shoe soles can be repaired. In some cases, the damage may be too extensive, and the sole will need to be replaced. However, if the damage is minor, it can often be repaired with a few simple steps. If you have a pair of shoes with damaged soles, give our team a call, and we’ll see if we can help you repair them.
You May Also Read: Do I Need Bigger Shoes for Insoles
