Tying your hiking shoes correctly is an essential skill for every outdoor enthusiast. Properly secured footwear not only enhances comfort during long walks but also prevents blisters, injuries, and accidental trips. This guide on how to tie hiking shoes will walk you through the steps to achieve a snug, reliable fit, ensuring your feet are well-supported on any terrain.

Whether you’re preparing for a short day hike or a multi-day backpacking adventure, mastering the art of tying your hiking shoes is a foundational aspect of your outdoor preparations.
Understanding Hiking Shoe Anatomy
Before we dive into the specifics of tying hiking shoes, it’s important to understand their unique anatomy. Hiking shoes are designed with several features that differentiate them from regular sneakers or athletic shoes, focusing on durability, support, and protection in rough terrain.
Upper:
The upper part of the hiking shoe is crafted to provide protection against the elements, often made from durable materials such as leather or synthetic fabrics. It’s where ventilation systems, waterproof membranes, and reinforcement areas are integrated.
Midsole:
This is the cushioning layer that absorbs impact and provides stability. Midsoles are typically made from EVA (ethylene-vinyl acetate) or polyurethane for a balance of lightness, comfort, and durability.
Outsole:
The bottom part of the shoe is designed to maintain traction on various surfaces. Look for deep grooves and rubber compounds that offer grip on wet and dry ground.
Lacing System:
Hiking shoes feature a secure lacing system designed to offer a snug fit. This system can include eyelets, hooks, and locking mechanisms to ensure that the laces stay tied, providing consistent support and comfort throughout your hike.

Understanding these components will not only help you choose the right pair of hiking shoes but also guide you in properly securing them for optimal performance on the trails.
Choosing the Right Laces
Selecting the appropriate laces for your hiking shoes is as crucial as mastering the tying technique. The ideal laces should be durable, able to withstand harsh trail conditions and maintain their grip without loosening over hours of trekking. Typically, laces made from synthetic materials, such as nylon or polyester, offer the best combination of strength, stretch resistance, and longevity. Additionally, consider the lace’s length; it should be long enough to allow for a secure tie but not so lengthy that the ends become a tripping hazard.
Some hikers prefer laces with a bit of texture, as they can hold knots more securely, preventing any untimely unfastening. When choosing your laces, also take into account any special features that may cater to your specific needs, such as waterproofing or reflectivity for those late evening or early morning hikes.
Needed Supplies
Hiking Shoes:
Make sure you have a comfortable pair of hiking shoes that fit your feet well.
Laces:
Choose durable laces, preferably made from synthetic materials. Make sure they are long enough to tie securely without being too lengthy.
Socks:
Wear the socks you plan on using during your hike to ensure a proper fit.
10 Simple Step-by-step Guidelines on How to Tie Hiking Shoes
Step 1: Ensure Your Shoes are Properly Laced
Before you begin tying your hiking shoes, it’s important to check that they are properly laced. Start by threading the laces evenly through each eyelet, beginning at the bottom and working your way up.
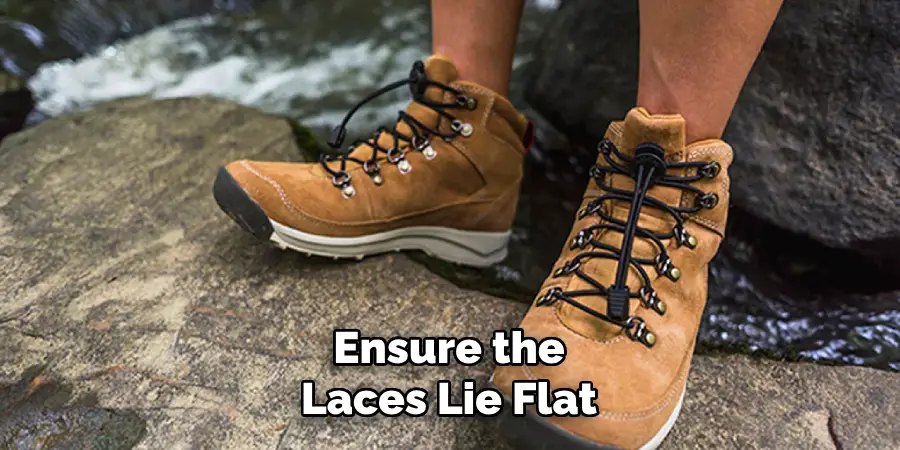
Ensure that the laces lie flat against the shoe; twisted laces can cause pressure points and discomfort. If your hiking shoes have a mix of hooks and eyelets, thread the laces through the eyelets first, then secure them around the hooks. This initial step is crucial for an even distribution of pressure when your shoe is tied, promoting comfort and stability during your hikes.
Step 2: Keep Some Slack
After ensuring your laces are properly threaded, loosely tie your hiking shoes to start shaping the basic fit. It’s important to leave some slack in the laces at this stage. This allows you to adjust the tightness more easily in the later steps, ensuring that the fit is not too tight or too loose. The slack should be enough to enable movement of the laces when pulling but not so much that the shoe feels loose on your foot. This balance is key to achieving a comfortable, supportive fit that adapts to your foot’s unique shape and movements as you hike.
Step 3: Start With a Basic Knot
Once you have ensured your shoes are loosely tied with the right amount of slack, begin by tying a basic knot. Cross the left lace over the right lace (or vice versa, depending on your preference), then pull it under the right lace and tighten. This basic knot serves as the foundation for the rest of your shoe-tying process, securing the laces in place so you can adjust the fit as needed.
Make sure the knot sits comfortably at the base of the lacing system; it should be tight enough to hold the laces together but not so tight that it creates discomfort or pressure against your foot. This step is crucial for maintaining the overall stability and comfort of the shoe throughout your hike.
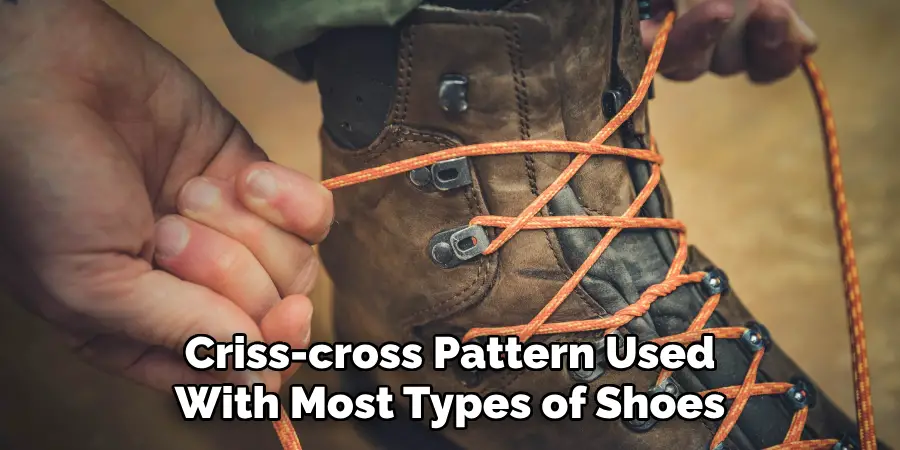
Step 4: Begin Lacing With the Traditional Criss-Cross Pattern
With your shoes properly laced and secured with a basic knot, proceed to lace them up using the traditional criss-cross pattern. This involves crossing the laces over each other and threading them through the opposite eyelets as you move up the shoe. Start from the knot at the base and work your way towards the tongue of the shoe, ensuring that each cross of the laces is snug but not too tight.
The criss-cross pattern helps distribute pressure evenly across the foot, providing a secure fit that supports natural foot movement. Remember to pull each lace tight enough to maintain the shoe’s shape around your foot but allow for slight flexibility to avoid restricting circulation or causing discomfort during long hikes.
Step 5: Adjust the Tightness as You Lace Up
As you continue lacing up your shoes, make sure to adjust the tightness of each cross according to your comfort level. The traditional criss-cross pattern can create pressure points, especially if tightened too much or too little. Take your time and pay attention to how the shoe feels on your foot as you lace up, adjusting the tightness of each cross to achieve a snug but not constricting fit. This step is critical for preventing blisters and hotspots that can quickly make your hike uncomfortable and unenjoyable.
Step 6: Use the Locking Mechanism
Many hiking shoes come equipped with locking mechanisms, such as hooks or eyelets, that help secure the laces in place and prevent them from loosening during your hike. If your shoes have this feature, make sure to utilize it as you lace up.

As you move up the shoe, thread the laces through each locking mechanism, using them to adjust the tightness of each cross and keep the laces securely in place. This step not only ensures the stability and comfort of your shoes but also reduces the risk of tripping over loose laces while trekking through rugged terrain.
Step 7: Double Knot for Extra Security
Once you have reached the top of your shoe, tie a double knot to secure the laces in place. This extra step adds an additional layer of security, preventing any accidental untying of your laces while hiking. To tie a double knot, simply make another basic knot with the two ends of your laces. Make sure to pull each end tight for a secure hold.
Step 8: Tuck in the Excess Laces
After securing your hiking shoes with a double knot, manage any excess lace length by tucking them into the sides of your shoes or under the crossed laces. This prevents the laces from becoming caught or snagged on underbrush, rocks, or other obstacles you may encounter along the trail. Tucking in the excess laces not only keeps your footwear neat and tidy but also ensures your safety and comfort, allowing you to focus on the trail ahead without distractions.
Step 9: Test for Comfort and Flexibility
Before heading out on your hike, take a few moments to test the tightness and flexibility of your shoes. Make sure they feel comfortable and supportive, allowing for natural foot movement without any rubbing or pressure points. If necessary, make adjustments to the tightness of the laces to achieve the perfect fit before hitting the trail. This step is crucial for preventing unnecessary discomfort and injuries during your hike.
Step 10: Recheck and Retie as Needed
Throughout your hike, it’s essential to periodically recheck the tightness and security of your shoelaces. The constant movement and terrain changes can cause laces to loosen or shift, affecting the stability of your shoes. If you notice any discomfort or slipping, take a moment to retie your laces for a secure fit. This simple step can make a significant difference in the overall comfort and enjoyment of your hike.

Following these steps on how to tie hiking shoes to properly tie your hiking shoes will not only ensure your comfort and safety on the trail but also extend the longevity of your footwear. It may seem like a small detail, but the right lacing technique can make all the difference in your hiking experience. So, next time you lace up your boots, take a few extra moments to follow these tips for a comfortable, secure, and enjoyable hike. Happy trails!
Troubleshooting Common Issues
Even with meticulous lacing, hikers often encounter a few common issues that can affect comfort and shoe performance on the trail. Here are solutions to some of the most frequent problems:
Laces Coming Untied:
If your laces often come undone, consider using a stronger double knot or a specialized knot for hiking shoes, like the surgeon’s knot, which provides extra security. Wet laces can also be more prone to slipping, so using water-resistant laces or giving your existing laces a wax treatment can help.
Pressure Points or Tight Spots:
If you feel uncomfortable pressure points or tight spots, try re-lacing your shoes using a different pattern that alleviates pressure on sensitive areas of your foot. The window lacing method, for example, can offer relief over the top of your foot by skipping eyelets to reduce tightness.
Shoes too Loose/Tight for Downhill/Upward Hikes:
Adjust the tightness of your laces based on the terrain. Before a steep decline, tighten the laces to prevent your feet from sliding forward and hitting the front of your shoes. For uphill treks, a slightly looser fit can enhance comfort by accommodating the natural swelling of your feet.
Hotspots or Blisters Forming Despite Proper Lacing:
Ensure your hiking socks are a good match for your shoes and conditions. Moisture-wicking and cushioned socks can greatly reduce friction and heat build-up. Also, consider applying blister prevention patches or tapes to vulnerable areas before starting your hike.
Uneven Wear on Laces:
If your laces show signs of uneven wear or fraying, it could indicate uneven pressure distribution. Inspect your lacing technique and adjust as needed to distribute tension more evenly. It may also be a sign that it’s time to replace your laces.

By addressing these common lacing and comfort issues with the appropriate adjustments and preventative measures, you can significantly enhance your hiking experience. Remember, the goal is to enjoy the hike without being sidelined by preventable footwear problems.
Maintenance and Care Tips:
After a thorough adventure, maintaining and caring for your hiking shoes is essential to extend their life and ensure they’re ready for your next outdoor excursion. Begin by cleaning your shoes after each hike, removing any dirt, mud, or debris using a soft brush or cloth. If your shoes are particularly dirty, a gentle wash with mild soap and water can do wonders. Always air dry your footwear away from direct heat sources, as high temperatures can damage the material and adhesive of the shoe.
Regularly check your shoes for any signs of wear and tear, paying close attention to the soles and seams. If you notice any damage, consider whether it’s something that can be repaired or if it’s time to replace your footwear. Additionally, invest in a good-quality waterproofing treatment if your hiking shoes aren’t already waterproof. This can protect them from the elements and increase their durability over time.
For those moments when your shoes get wet, stuff them with newspaper to absorb the moisture and help them retain their shape as they dry. Remember to replace the newspaper as it becomes damp. Finally, storing your hiking shoes in a cool, dry place will prevent the buildup of mold and mildew, ensuring your shoes are in perfect condition for your next adventure. By following these simple maintenance and care tips, you can significantly prolong the life of your hiking shoes and enjoy many more trails in comfort and safety.
Frequently Asked Questions
Q: Can I Use These Same Steps to Tie Other Types of Shoes?
A: Yes, the traditional criss-cross pattern and basic knot can be used with most types of shoes. However, make sure to adjust the tightness and lacing method according to the specific style and fit of your footwear.
Q: How Often Should I Retie My Laces During a Hike?
A: It’s recommended to check and retie your laces every 1-2 hours during a hike or whenever you feel discomfort or slipping. This helps maintain a secure and comfortable fit throughout your journey. You can also adjust the tightness based on terrain and conditions.
Q: Are There Any Tips for Preventing Blisters While Hiking?
A: Yes, proper lacing techniques can help prevent blisters by distributing pressure evenly across the foot and avoiding hotspots. Additionally, wearing moisture-wicking socks and properly fitting shoes can also help prevent blisters. Remember to break in new shoes before a long hike and apply moleskin or bandages to any potential friction areas on your feet.
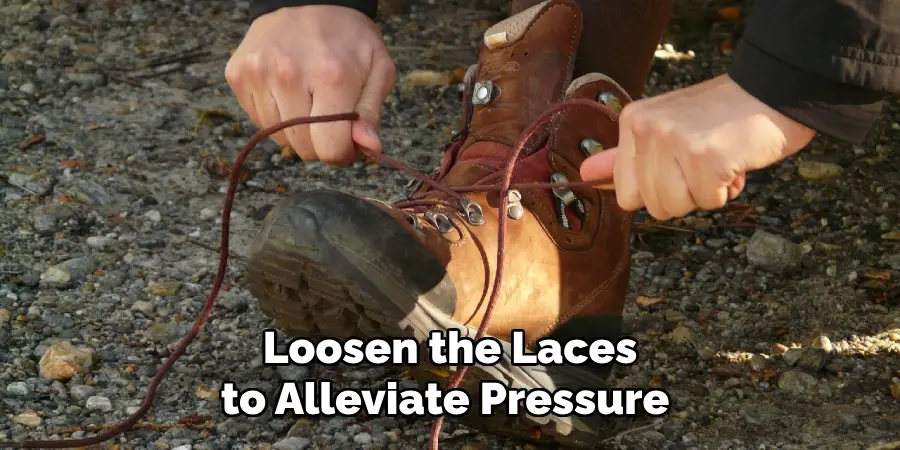
Q: How Do I Know If My Shoes Are Too Tight?
A: If you experience numbness, tingling, or discomfort while hiking, it’s likely that your shoes are too tight. Loosen the laces or adjust the lacing pattern to alleviate pressure on your feet. It’s essential to find the right balance between a snug and secure fit without causing discomfort or restricting circulation.
Always listen to your body and make adjustments as needed for a comfortable and enjoyable hike.
Conclusion
Properly lacing your hiking shoes is an essential step for achieving a supportive, comfortable fit that allows you to tackle any trail with confidence. By following these steps on how to tie hiking shoes and regularly checking and adjusting the tightness of your laces, you can prevent discomfort, blisters, and injuries, ensuring a pleasant and memorable hiking experience.
Don’t overlook this crucial aspect of footwear preparation and enjoy your next hike to the fullest! So lace up those boots, hit the trail, and have an amazing adventure in the great outdoors. Happy hiking!