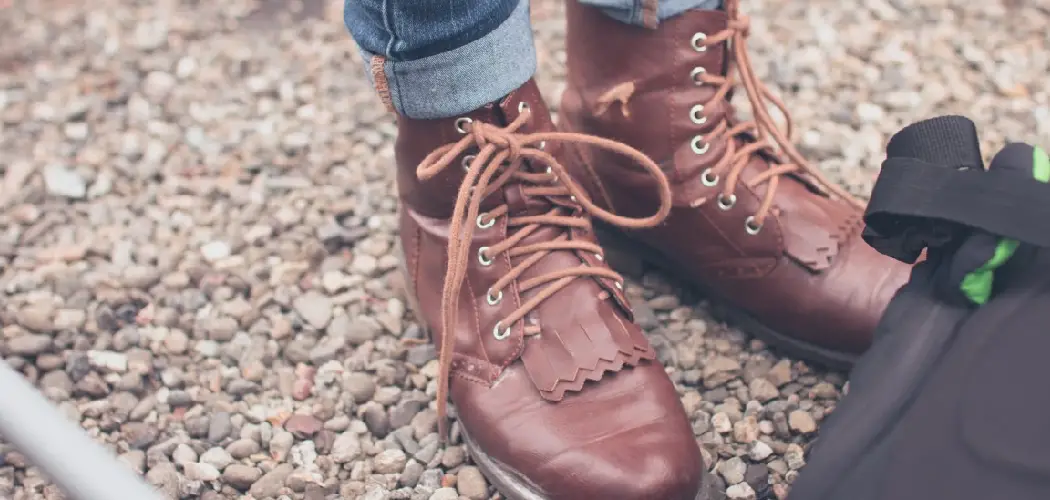
Are you tired of constantly having to re-tie your boots throughout the day? Or perhaps you struggle to find the perfect fit for them?
How to lace boots diagram is essential not only for comfort but also for ensuring foot support and stability during various activities. Whether you’re preparing for a hike, heading to work, or just wearing boots for a casual outing, understanding different lacing techniques can make a significant difference. This guide provides step-by-step diagrams to help you master the art of boot lacing, showcasing methods that adapt to other types of boots and personal preferences.

From traditional straight lacing to more unique methods tailored to specific needs, learning to lace your boots effectively can enhance your footwear’s functionality and longevity.
What Will You Need?
Before diving into the different lacing techniques, it’s important to gather all the necessary materials. Here are some essential items you will need:
- A pair of boots
- A lace or a shoelace
- Tape (optional) – for temporary hold on long laces
Ensure that your boots and laces are clean before beginning the process. It’s also recommended to use lace with enough length to allow for proper adjustments and tying.
9 Easy Steps on How to Lace Boots Diagram
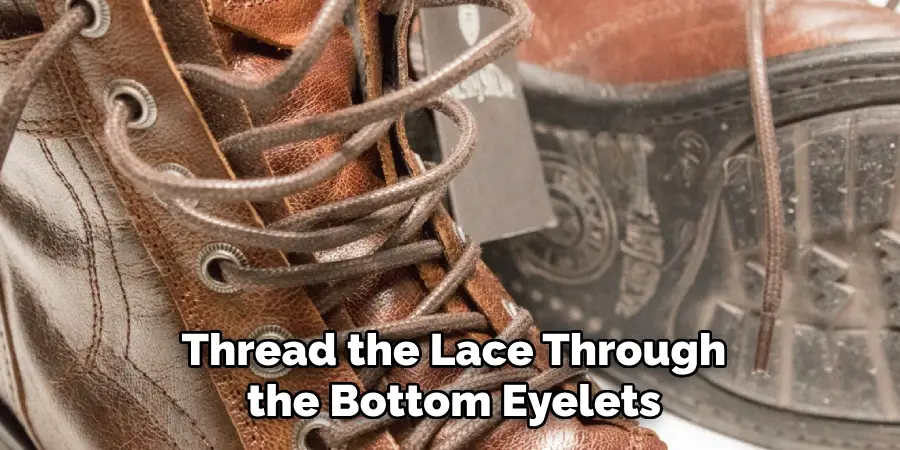
Step 1: Start at the Bottom
To begin lacing your boots, thread the lace through the bottom eyelets. Ensure that both ends of the lace are even in length. This foundational step is crucial for evenly distributing tension as you continue lacing the boot. Starting from the inside and pulling the laces outward through the eyelets helps create a neat and comfortable fit right from the start.
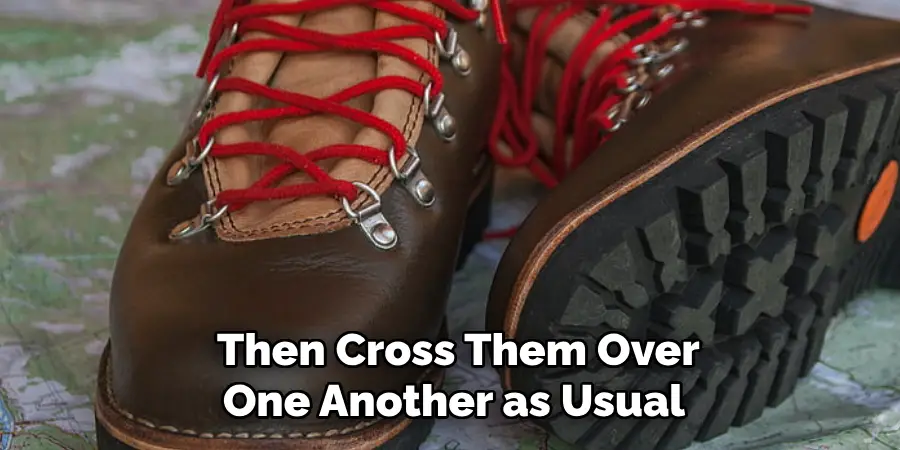
Step 2: Criss-Cross Method
Continue with the criss-cross method by taking the left lace and crossing it over to the right eyelet, threading it from the inside out. Then, take the right lace and cross it over to the left eyelet, threading it similarly. This creates a tidy criss-cross pattern that looks neat and helps maintain consistent tension across the boot. Adjust each crossing as you go to ensure that the laces remain snug but not too tight, allowing for comfortable movement. It’s essential to maintain this criss-cross technique evenly up the boot to ensure a balanced fit that supports the foot without causing strain or discomfort.
Step 3: Execute the Ladder Technique
Once you’ve reached the midpoint of your boot, consider switching to the ladder lacing technique to add extra support. For this method, thread the left lace vertically through the next eyelet above on the same side. Do the same with the right lace. Once both laces are threaded vertically, cross the left lace over to the right side, threading it under the vertical lace, then do the same with the right lace. This creates a ladder-like pattern that helps secure and stabilize the boot, providing additional ankle support during physically demanding activities.
Continue this technique until you reach the top eyelets, ensuring each loop remains firm to maximize the benefits of this lacing style.
Step 4: Incorporate the Surgeon’s Knot
After you have completed the ladder technique, the next step is to incorporate the surgeon’s knot for enhanced security. Pull the laces firmly upward after your last ladder loop, then cross them over one another as usual. However, loop each lace around the other twice before moving on to the next eyelet. This double loop creates friction, effectively holding the laces in place and preventing them from loosening over time.
This knot is handy if you require firmer tension in specific areas of the boot or during activities requiring prolonged boot wear, such as hiking. Once tied, your laces should feel securely held, offering increased support and reducing the risk of needing frequent adjustments.
Step 5: Finish with the Heel Lock
Consider implementing the heel lock technique to add stability and complete your boot lacing. Start by threading the left lace through the top horizontal eyelet on the same side, and do the same with the right lace on the other side. This creates a loop on each side at the top of your boot. Next, take the left lace and thread it through the loop created on the right side, and take the right lace and thread it through the loop on the left side.
Pull the laces tightly to secure the loops snugly around the ankle. This final step helps to anchor your heel, minimizing slip and maximizing support — an essential adjustment for activities that involve a lot of foot movement or uneven terrain. Finally, tie your laces in a bow or double knot to prevent them from coming undone. With this technique, your boots should now be firmly secured, ready to provide support and comfort for any adventure you embark on.
Step 6: Assess the Fit and Adjust as Needed
After completing your lacing techniques, it’s crucial to assess the overall fit of your boots. Stand up and walk around to ensure your feet feel supported yet comfortable. Check for any areas that feel too tight or loose, adjusting the tension on the laces as necessary. Pay particular attention to the heel and ankle areas to ensure they are secure without restricting movement.
If needed, go through the lacing process again to fine-tune specific sections, such as loosening at the toes or tightening around the ankles. Remember, an adequately laced boot should feel snug and supportive, enhancing your comfort and performance during any activity.
Step 7: Tidy Up Excess Laces
Once you’ve achieved the perfect fit and are satisfied with the lacing tension, it’s time to deal with any excess lace. Having too much lace dangling can be cumbersome and even hazardous. If your laces are particularly long, you may want to tuck the ends into the sides of your boots to prevent tripping or snagging. You can also opt for shorter laces if excess lace consistently poses a problem or use lace anchors or stoppers to keep them tidy.
Additionally, consider a double knot or a bow knot to ensure that your laces remain securely fastened throughout your activities. Keeping your laces neat enhances safety and gives a clean, polished look to your entire boot presentation.
Step 8: Treat Your Laces and Boots
After ensuring your boots are laced perfectly, it’s beneficial to treat both your laces and the boots themselves for longevity. Regularly cleaning your laces by removing and washing them by hand or in a gentle machine cycle can prevent dirt and grime build-up that weakens the fibers. Additionally, consider waterproofing your laces to protect them from moisture, which can cause fraying.
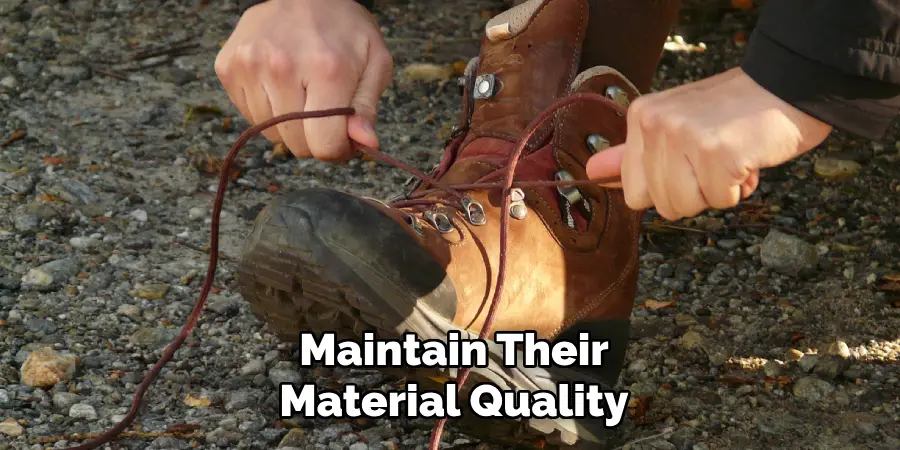
Regular polishing and conditioning are recommended for the boots to maintain their material quality and appearance. Leather care products can protect against water damage and help preserve the boot’s structural integrity. By taking these steps, you’ll prolong the life of your boots and laces, ensuring they support you effectively on all your adventures.
Step 9: Routine Checks and Maintenance
To ensure your boots remain in prime condition, incorporate routine checks and maintenance into your regular care habits. Inspect the laces and eyelets after every few uses to detect any signs of wear such as fraying laces or loosening eyelets. Promptly address any issues to prevent them from worsening; replace laces that appear too worn and fix any loose eyelets with the help of a professional if necessary.
Additionally, evaluate the soles for signs of diminishing grip or thin spots that could affect traction. For boots frequently exposed to harsh environments, consider treating the exterior with protective sprays or sealants designed for the material type. By staying proactive with these checks, you enhance your boots’ longevity and performance, ensuring they continue to offer ample support during your endeavors.

With these steps, you have the knowledge and skills to properly lace your boots for optimal comfort, support, and safety. Remember to assess your individual needs and adjust the techniques accordingly.
5 Things You Should Avoid
- Skipping Steps: Avoid leaving out steps in the diagram that can lead to confusion. Each step should be clearly illustrated and explained.
- Overcomplicating Design: Keep the diagram simple. An overly complex design can deter users from attempting the lacing.
- Using Ambiguous Symbols: Ensure all symbols and marks are clearly defined and universally understood to prevent misinterpretation.
- Ignoring Different Boot Styles: The diagram should account for various boot styles and lace types to ensure it applies to a wide range of footwear.
- Lack of Annotations: Avoid providing a diagram without detailed annotations. Helpful notes can more effectively guide users through the lacing process.
Conclusion
In conclusion, creating an effective boot-lacing diagram requires attention to clarity, simplicity, and adaptability.
The diagram becomes an invaluable tool for users by ensuring that every step is accurately captured and each symbol used is unambiguous. Simplicity should be prioritized to make the process approachable while retaining functional richness by catering to different boot styles and lace types. Adding detailed annotations provides essential guidance, making the lacing process more accessible and comprehensive. With these considerations, users will be equipped with a reliable resource for achieving their ideal boot-lacing results.
Hopefully, the article on how to lace boots diagram provided valuable information and insights to help you create a successful boot lacing diagram. Happy lacing!