
Star lacing has emerged as a captivating and distinct method for personalizing one’s footwear, transforming ordinary sneakers into masterpieces of self-expression and style. This introduction to star lacing reveals a pathway to revitalizing your shoe game, offering an innovative way to wear your shoes with a twist. This technique allows you to stand out in a crowd and provides a fantastic opportunity to express your individuality and creativity through your choice of laces and patterns.
This guide is meticulously crafted to walk you through the process of how to do star laces, ensuring everyone from beginners to seasoned enthusiasts can easily customize their footwear. By following our step-by-step instructions, you will learn the intricacies of creating this eye-catching design, enabling you to add a personal touch to your shoes that reflects your unique personality and style.
Gather Materials
The first step to mastering the art of star lacing lies in gathering the right materials. This not only sets the foundation for the entire process but also ensures that the end result is both visually appealing and secure.
A. Shoes:
The ideal candidates for star lacing are shoes that feature an even number of eyelets, allowing symmetry and balance in the pattern. Eyelets should be evenly spaced to facilitate a uniform star pattern across the shoe. Whether you’re looking to revamp a pair of casual sneakers or elevate a more formal shoe, the key is in selecting a pair that best complements the intricate design of star lacing.
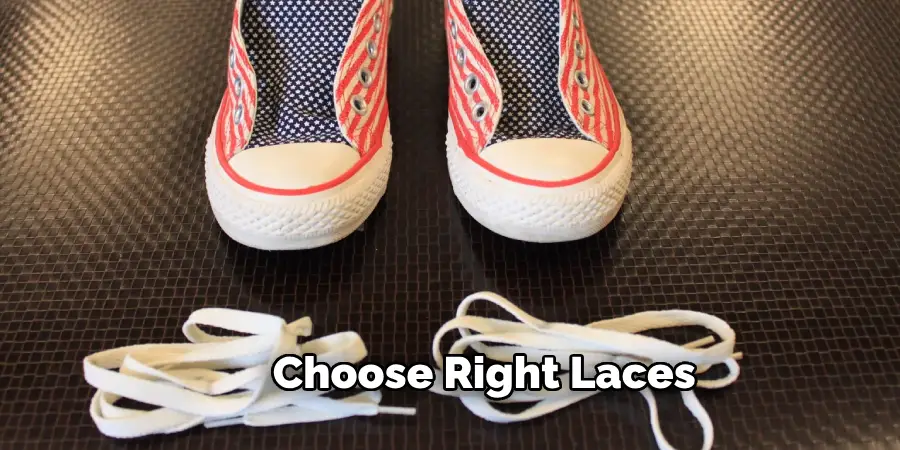
B. Laces:
Choosing the right laces can dramatically enhance the visual appeal of the star pattern. Opt for laces that contrast strikingly with the color of your shoes to make the pattern stand out. Consider the width and length of the laces as well; flat, wide laces can offer a bold look, while thinner laces might provide a more refined appearance. The length should be sufficient to complete the lacing without stretching too tightly, ensuring a comfortable fit.
C. Optional:
Consider using tape or a clip, especially when forming the initial patterns, to make the lacing process smoother and keep the laces in place. This can be particularly helpful for keeping the tension even throughout the shoe, which is crucial for achieving a symmetrical and tidy star pattern. Although not strictly necessary, these tools can simplify the lacing process and enhance the overall experience.
Gathering your materials thoughtfully is the first step in transforming your footwear. With the right shoes, laces, and optional aids at your disposal, you’re well on your way to creating a unique and stylish pair of star-laced shoes.
Prepare the Shoes
Before you begin the enchanting process of creating star laces, it’s crucial to properly prepare your shoes to ensure the best possible outcome. This preparation phase is an integral step, one that sets the stage for a smooth lacing experience and a stunning final result.
A. Remove Existing Laces:
The initial step in your preparation involves removing the existing laces from your shoes. This action is more than just a procedural task; it symbolizes the start of a transformation, clearing the way for your creativity to flourish through the star-lacing pattern. Gently unlace your shoes, ensuring not to tug or pull too hard which might damage the eyelets. Removing the old laces gives you a blank canvas on which to work, allowing the beauty of the star pattern to take center stage.
B. Clean Eyelets:
With the laces removed, turn your attention to the eyelets. These small but crucial components must be clean and free from any dirt or debris to facilitate smooth lacing. Use a soft brush or cloth to gently clean around and inside the eyelets. For more stubborn dirt, a cotton swab slightly dampened with water can be employed to meticulously clean the areas. This step ensures that the laces glide effortlessly through the eyelets without snagging, making the lacing process more enjoyable and the finished product neater.
C. Align Shoes:
Finally, position your shoes on a stable surface with the toe facing toward you. This alignment is more than just for convenience; it provides you with a clear perspective of the eyelets and the overall structure of the shoes, which is crucial for planning and executing the star lacing pattern. Ensuring that your shoes are stable and well-aligned allows easy eyelet access and contributes to a more precise and symmetrical lacing pattern.
By meticulously following these steps to prepare your shoes, you’re not just setting the foundation for the star lacing pattern; you’re ensuring that the process is as smooth and enjoyable as possible. Each action, from removing the laces to cleaning and aligning the shoes, is a step towards transforming your ordinary footwear into a personalized expression of style.

How to Do Star Laces: Begin the Lacing Process
Now that you have prepared your shoes and gathered all the necessary materials, it’s time to begin the magical process of star lacing. This step-by-step guide will lead you through each phase of the lacing process, ensuring clarity and ease as you create this unique design.
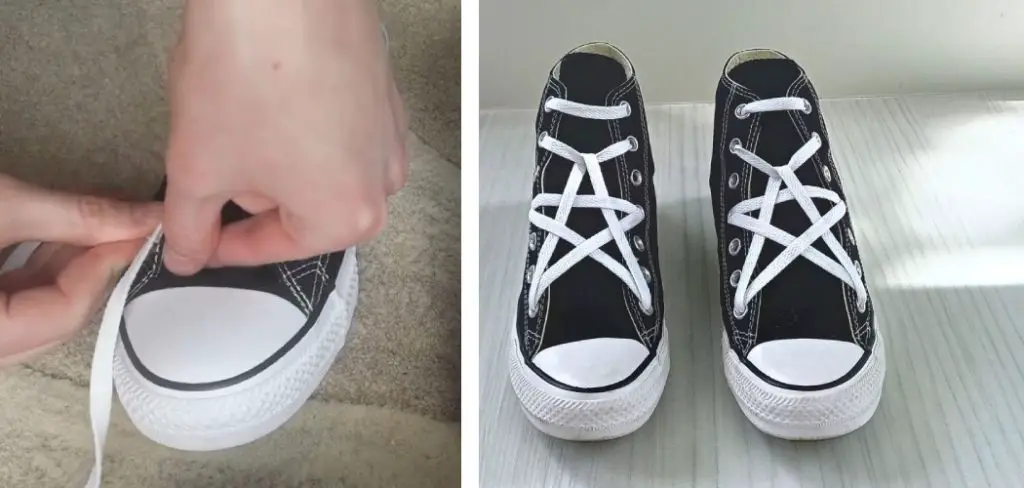
A. Start at the Bottom:
The adventure into star lacing begins at the base of your shoe. Carefully insert one end of the lace into the bottom left eyelet, and then do the same with the other end on the right, ensuring that both ends come out through the top of these eyelets. It’s important to pull the lace through until you have equal lengths of lace on either side to maintain symmetry throughout the lacing process. This initial step is crucial as it lays the groundwork for the pattern that will develop as you advance upwards.
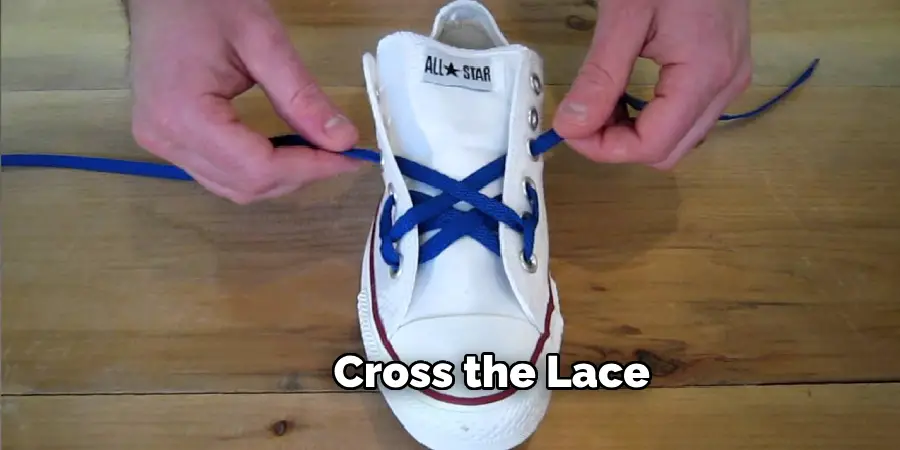
B. Cross Over:
Once the lace ends are aligned, take them and cross them over each other, creating an “X” shape across the front of the shoe. Now, feed each end down through the next pair of eyelets on the opposite sides. This creates the first crossing that is characteristic of the star-lacing pattern. Ensure that the lace sits flat against the shoe to prevent twisting, which can detract from the neatness of the final pattern.
C. Repeat Cross Over:
Continue the process of crossing the lace ends over to the opposite side and feeding them down through the next set of eyelets. With each consecutive crossover, you will notice the beginning of a star pattern emerging. The consistency in crossing over is vital as it forms the precise star shape that makes this lacing technique so distinctive. Keep the tension even but not too tight; this allows for adjustments as the pattern develops and maintains comfort when wearing the shoes.
Repeat the crossover step, working your way up the eyelets until you reach the top. With each step, be mindful of symmetry and tension to ensure the pattern remains even and the laces are not pulled too tight. The process is meditative and creative, resulting in a lacing pattern that enhances the aesthetic appeal of your shoes and makes a statement about your personal style.
How to Do Star Laces: Create Star Pattern
Now that your shoes are prepared and the initial steps of the lacing process are complete, it’s time to focus on creating the star pattern, the centerpiece of this unique lacing technique. This segment will guide you through the steps needed to form the star patterns, bringing the distinctive flair of star lacing to life on your footwear.
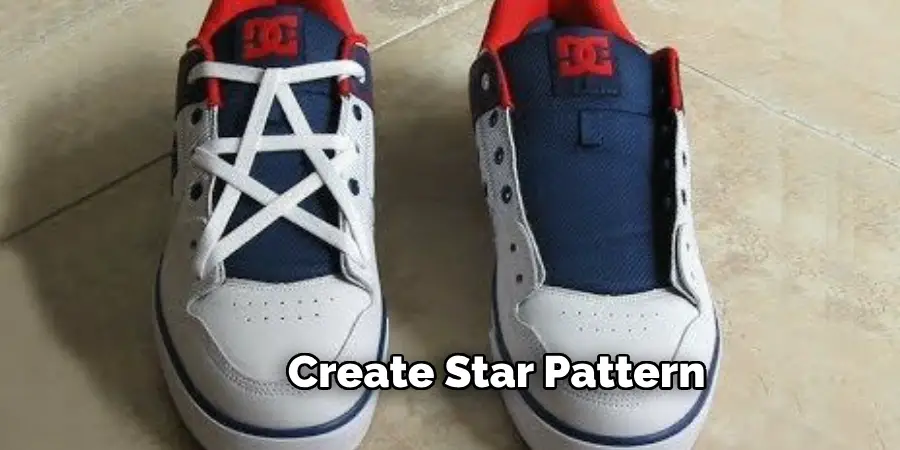
A. Form First Star:
Start at the top pair of eyelets. At this stage, the approach changes slightly to form the actual stars. Cross the lace ends over each other horizontally across the front of the shoe and then feed them down through the opposite eyelets. This crossover should be done carefully to ensure that when you pull the laces down, the star begins to take shape. The formation of the first star is critical as it sets the tone for the rest of the pattern to follow.
B. Form Second Star:
Moving down to the second pair of eyelets from the top, repeat the process to create another crossover. This crossover is identical to the first, reinforcing the star pattern. By pulling the lace ends down through the opposite eyelets once more, you will begin to see the second star-forming. This step is essential in ensuring the continuity of the star pattern, creating a visually compelling sequence that captivates and enhances the shoe’s appearance.
C. Repeat Pattern:
Continue the process of alternating between horizontal crossovers and feeding the lace ends down through the opposite eyelets. With each repetition, additional stars will form down the front of the shoe. This consistent repeating of the pattern is what allows the star design to truly stand out, creating a striking visual impact. It is important to maintain even tension and symmetry as you work your way down, as this will keep the stars aligned and the overall pattern neat.
The creation of the star pattern is both meticulous and rewarding. Each step contributes to the transformation of ordinary footwear into a personalized fashion statement. By following these steps diligently, you will have a beautifully laced pair of shoes that showcase your creativity and pay homage to the intricate art of shoelacing.
Secure and Adjust
With the star pattern now adorning your shoes, the next crucial phase is to secure and adjust the laces to finalize the transformation. This step ensures that not only does the lacing look visually appealing, but it also guarantees the shoes are comfortable to wear.
A. Tighten Laces:
Begin by gently pulling on both ends of the laces to tighten them. Start at the bottom and work your way up, adjusting the tension as you go. This step is essential for ensuring that the shoe fits snugly against your foot, providing both comfort and support. It’s important to pull the laces tight enough to maintain the intended fit yet not too tight as to distort the star patterns or create discomfort when wearing the shoes.
B. Check Alignment:
Once you have tightened the laces, take a moment to inspect the alignment of the stars. They should be symmetrical and evenly spaced along the length of the shoes. If any adjustments are needed, gently loosen and re-tighten the laces in the specific area. This attention to detail is what elevates the overall look of the shoes, ensuring the star pattern is showcased to its full potential.
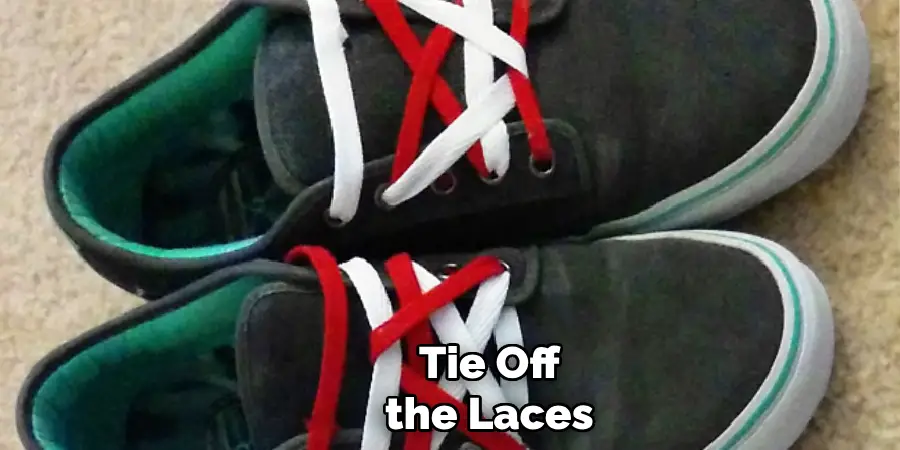
C. Tie Off Laces:
After ensuring the stars are perfectly formed and the shoes are comfortably fitted, proceed to tie off the laces in your preferred knot style at the final eyelets. Whether you choose a simple bow, a double knot, or another secure tying method, ensure that it is tied tightly to prevent the laces from coming undone. This secures the shoe and complements the intricate lacing pattern you’ve created.
Securing and adjusting the laces are the final steps in personalizing your footwear with the star lacing technique. Your shoes stand out visually and provide a comfortable and secure fit, a testament to the care and attention you’ve invested in this creative process secures the shoe and. The beauty of this lacing technique lies not just in its appearance but also in its versatility and adaptability, allowing you to express your unique style through your footwear.
Finishing Touches
Completing your shoe lacing masterpiece requires a bit of fine-tuning to ensure the details are just right. This part of the process is more about aesthetics and personal preference, giving your shoes that final touch of personality.
A. Trim Excess Lace:
After you’ve secured and adjusted your laces to perfection, it’s likely you’ll find some excess lace at the ends. Carefully trim this excess to achieve a neat and tidy appearance, ensuring not to cut too close to the knot to allow for future adjustments. This step is crucial for maintaining the polished look of your footwear, ensuring that the focus remains on the intricate star pattern you’ve worked so hard to create.
B. Optional: Add Aglets or Lace Charms:
For those seeking additional personalized detail and extra flair, consider adding aglets or lace charms to your shoelaces. Aglets, the plastic or metal tips at the end of laces, can be customized in various colors and materials, adding both functionality and style. Lace charms, whether reflective of personal interests or simply decorative, can slide onto the laces, uniquely expressing your style. This optional step is a fun way to enhance the uniqueness of your footwear, setting your shoes apart from the rest.
(Frequently Asked Questions) FAQ’s on Star Lacing Techniques
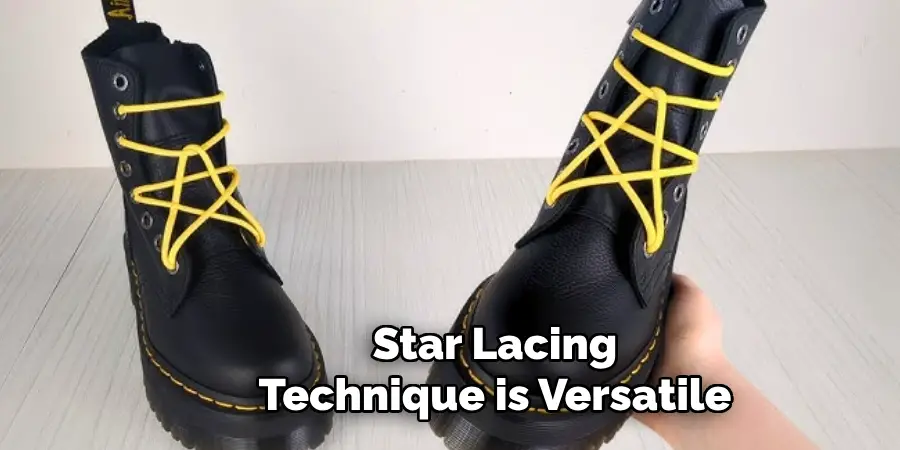
Q1: Can I Use the Star Lacing Technique on Any Type of Shoe?
A1: Yes, the star lacing technique is versatile and can be applied to most types of shoes with eyelets, including sneakers, boots, and casual shoes. The key is to have enough eyelets (at least 6 pairs) to create an effective star pattern.
Q2: Do I Need Special Laces for This Technique?
A2: No, special laces are not required for the star-lacing technique. However, using flat laces may enhance the visual impact of the star pattern compared to round laces. Ensure the laces are long enough to accommodate the intricate lacing without becoming too short to tie securely.
Q3: How Do I Adjust the Laces to Fit My Feet Comfortably?
A3: Start by lacing your shoes loosely, then adjust the tension starting from the toe and work your way up, pulling each section snugly but not too tight. After you’ve finished lacing, walk around to ensure the shoe fits comfortably with no pinching or loose sections. Adjust as necessary for the best fit.
Q4: Can I Still Perform This Lacing Technique if Some Eyelets Are Missing or Broken?
A4: While missing or broken eyelets pose a challenge, you can still attempt the star-lacing technique by skipping the affected eyelets or improvising with nearby eyelets. The final pattern might differ slightly but can still achieve an appealing aesthetic.
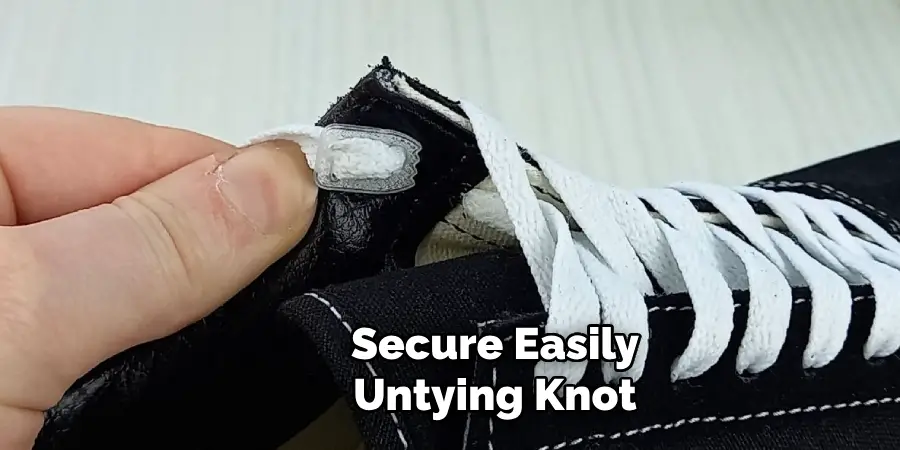
Q5: Is It Difficult to Untie or Remove Shoes with Star Lacing?
A5: Shoes with star lacing can be slightly more intricate to untie than those with traditional lacing, especially if the laces are tied tightly. To facilitate easy removal without disrupting the entire lacing pattern, a at the top is a good practice.
Conclusion
In this guide, we meticulously walked through the steps for achieving the star-lacing pattern for your shoes, turning ordinary footwear into a canvas of personal expression. From the initial crossover that forms the first star to the careful tightening and adjustment to showcase the pattern in its full glory, each phase plays a crucial role in how to do star laces. This lacing technique is more than just a method; it’s a form of self-expression and creativity.
I encourage you to experiment with different lacing techniques and styles to elevate your shoe game and reflect your unique personality through your footwear. Don’t shy away from trying new patterns or inventing your own, as this can add a touch of individuality to your attire.
Star lacing is merely the beginning. Let it inspire you to embrace creativity and individuality in all your fashion choices. You can transform the mundane into something extraordinary through fun and innovative lacing patterns, proving that even the smallest details can express who you are.