
Are you tired of seeing the same sneakers on everyone’s feet? Do you want to stand out from the crowd with a unique pair of customized kicks?
How to customize your own sneakers is a creative and rewarding way to express your personal style and make a unique fashion statement. This process allows you to transform a pair of plain sneakers into a one-of-a-kind masterpiece that reflects your individuality. With various techniques and materials available, such as fabric paint, markers, embroidery, or even patches, the possibilities for customization are virtually endless. Whether you’re an aspiring designer or simply looking to refresh an old pair of shoes, customizing sneakers can be a fun and fulfilling experience.
In the following sections, we’ll explore different methods and offer helpful tips for starting your sneaker customization journey.
What Will You Need?
Before you dive into customizing your sneakers, gathering all the necessary materials is essential. Depending on the techniques and design ideas you have in mind, here are some general supplies to consider:
- A pair of sneakers (preferably made of canvas or leather material for better adhesion)
- Fabric paint, markers, sharpies, or other coloring agents
- Brushes and masking tape for precision painting
- Iron-on patches or embroidery thread and needles for adding designs or logos onto the shoes
- Protective sealant spray to preserve the design and prevent fading over time
Additionally, consider using reference images or sketches to guide your design. This can help you stay organized and focused while working on your custom sneakers.
10 Easy Steps on How to Customize Your Own Sneakers
Step 1: Choose Your Design
When choosing your design, the options are as expansive as your imagination. Begin by considering what inspires you—a favorite color palette, a cherished theme like nature or sports, or even a particular pattern. Visualize how these elements can be translated onto your sneakers. Sketching your ideas on paper can be incredibly helpful, allowing you to experiment with different layouts and motifs before committing them to the shoes.
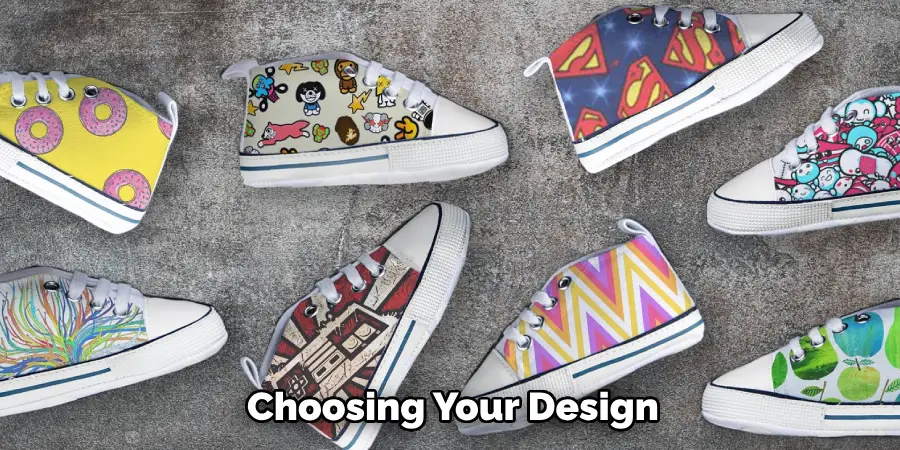
You can also look for inspiration online or in fashion magazines, where you might find trendy concepts or innovative designs that resonate with your style.
Step 2: Prepare Your Sneakers
Before you start customizing, it’s crucial to prepare your sneakers to ensure the best results properly. Begin by cleaning them thoroughly to remove any dirt, dust, or oils that could interfere with the adhesion of your materials. Use a mild soap and a soft brush to scrub away grime, then let your sneakers dry completely. If your shoes have any existing designs or glosses, you may need to gently sand the surface with fine-grit sandpaper to create a texture that holds paint or markers better.
Also, use masking tape to protect areas you don’t want to alter, such as midsole edges or logos. Proper preparation will facilitate a smoother application and help your customizations last longer.
Step 3: Gather Your Materials
Once your sneakers are ready, it’s time to gather all the materials you’ll need for your customization project. Organize your workspace by laying out your fabric paints, markers, brushes, and embellishments like patches or embroidery threads. It’s helpful to keep everything within reach to easily experiment and mix colors or materials. If you opt for intricate designs, have reference images or your sketches on hand to guide the process.
Being well-prepared with a clean and organized setup will help ensure a seamless and enjoyable customization experience, allowing your creativity to flow without interruptions.
Step 4: Apply Your Base Color
Start your customization by applying a base color to your sneakers, which will serve as the foundation for your design. Choose a color that complements your overall theme and use fabric paint or markers to cover the entire surface or specific sections, depending on your design plan. If you’re painting the whole shoe, apply the paint evenly using a brush, starting with a thin layer, and let it dry completely before adding additional coats for a richer color.
You might prefer using markers for precision for smaller areas or detailed patterns. Remember to work in a well-ventilated area and allow ample drying time between layers to prevent smudging and ensure a clean finish.
Step 5: Add Details and Designs
With the base color applied and dried, it’s time to add details and intricate designs to your sneakers. Use fine-tipped paintbrushes or markers to incorporate patterns, symbols, or text onto your sneakers. This is where your creativity truly comes into play—experiment with techniques such as stippling, cross-hatching, or blending colors to achieve your desired effect.
If you plan to add iron-on patches or embroidered elements, position them carefully and follow the application instructions to ensure they adhere properly. Take your time with this step, as attention to detail can transform your sneakers from basic to extraordinary. Remember to allow sufficient drying time for any paint or markers used before proceeding to the next steps.
Step 6: Secure the Design
Once you’re satisfied with your sneakers’ details and designs, securing your artwork is essential to ensure it lasts. Apply a protective sealant spray over the entire surface of the sneakers to lock in the colors and prevent fading. Make sure to choose a sealant that is compatible with your materials, whether painted or embroidered. Hold the spray can at the recommended distance and apply a light, even coat, allowing it to dry thoroughly before adding additional layers if necessary.
This step not only helps to preserve your design but also adds a layer of protection against everyday wear and tear, keeping your custom sneakers looking vibrant and fresh for longer.
Step 7: Allow for Proper Drying Time
After securing your design with a protective sealant, it’s crucial to give your sneakers adequate drying time before wearing them. The drying process is vital to ensure all applied materials are fully set and adequately adhered to the surface. Place your sneakers in a well-ventilated area, away from direct sunlight or heat sources, which could cause uneven drying or distort your designs.

Depending on the materials used and the thickness of applied layers, drying time may vary, so it’s best to refer to the instructions on your sealant and other materials for guidance. Generally, allowing 24-48 hours is sufficient for thorough drying. Patience at this stage will pay off, ensuring your customized sneakers are ready for use without any risk of damage or smudging.
Step 8: Show Off Your Custom Sneakers
Now that your custom sneakers are thoroughly dried and ready, it’s time to showcase your unique creation. Whether you wear them for a casual outing or a special event, your sneakers will make a statement. Consider sharing photos of your customized design on social media platforms, fashion blogs, or local footwear communities to inspire others with your creativity.
Custom sneakers can also be a great conversation starter, connecting you with fellow sneaker enthusiasts and artists. Take pride in your work and enjoy the attention your one-of-a-kind sneakers attract as you confidently express your style.
Step 9: Maintain Your Custom Sneakers
Regular maintenance is vital to keeping your custom sneakers looking their best. Clean them carefully with a damp cloth to remove any surface dirt or dust, being gentle around delicate designs or embellishments. Avoid soaking your sneakers, as excessive moisture can damage your customizations. Use a soft brush or a toothbrush to tackle more stubborn spots, but be mindful of the materials.
Regularly reapply a protective sealant for added longevity, especially if you notice any signs of wear.
Step 10: Store Your Custom Sneakers Properly
Proper storage is essential to maintain the condition and appearance of your custom sneakers. When not in use, store them in a cool, dry place away from direct sunlight to prevent fading and discoloration of your designs. It’s also helpful to stuff the shoes with tissue paper or shoe trees to help keep their shape and avoid creases. If you have multiple pairs or limited space, consider using shoe boxes or an organizer to prevent dust accumulation and reduce the risk of accidental damage. For long-term storage, ensure your sneakers are clean and completely dry to avoid mildew or odor buildup.
By following these steps, you can unleash your inner artist and create a one-of-a-kind pair of custom sneakers that reflect your personality and style.
Conclusion
How to customize your own sneakers is a rewarding and creative endeavor that allows you to express your personal style and flair.
By following the outlined steps, you can transform a plain pair of sneakers into a unique masterpiece that speaks to your individuality. From choosing the suitable materials and colors to meticulously painting, designing, and securing your artwork, each stage offers an opportunity to innovate and personalize your footwear. With attention to detail, proper drying, and maintenance, your custom sneakers will not only make a statement but also stand the test of time.
Embrace the process, enjoy the creative journey, and wear your custom sneakers with pride, knowing they are a true reflection of your artistic vision.