Are you tired of seeing scuff marks and stains on your favorite leather loafers? Cleaning leather loafers is a simple process that can help keep them looking like new.
How to clean leather loafers is essential for maintaining their appearance and longevity. Leather, being a natural material, requires specific care to prevent damage and preserve its quality. Proper cleaning removes surface dirt and stains and helps condition and hydrate the leather, preventing it from cracking or losing its luster.
In this guide, we will provide step-by-step instructions on effectively cleaning and caring for your leather loafers, ensuring they remain a stylish and durable addition to your wardrobe. Whether you wear your loafers for casual outings or formal occasions, knowing the right cleaning techniques is key to keeping them looking their best.
What Will You Need?
Before we dive into the cleaning process, here is a list of essential items you will need:
- Soft bristle brush or clean cloth
- Leather cleaner
- Leather conditioner
- Clean water and a damp cloth
- Newspaper or paper towels (optional)
It’s important to note that not all leather cleaners and conditioners are created equal. When purchasing these products, read the label and check if they suit your specific type of leather. Using the wrong products can cause damage, discoloration, or even ruin your loafers.
10 Easy Steps on How to Clean Leather Loafers
Step 1. Remove Laces:
Begin by taking out the laces from your loafers if they have any. This step is crucial because it allows you to clean every inch of the shoe’s surface, including areas around the eyelets that can accumulate dirt and debris. Removing the laces also prevents them from getting wet or stained during cleaning, which can lead to discoloration or damage.
If the laces are dirty, you can clean them separately by soaking them in a mild detergent solution and allowing them to air dry entirely before lacing them back into your loafers. Taking the time to remove and clean the laces helps ensure that every visible component of your loafers looks pristine once the cleaning process is completed.

Step 2. Dust Off the Surface:
Use a soft bristle brush or a clean cloth to dust off the surface of your loafers gently. This step is essential to remove loose dirt and debris that may have accumulated. Begin by brushing the entire shoe, paying particular attention to seams and stitches where dust usually collects. Be gentle in your approach to avoid scratching the leather surface.
If you’re using a cloth, ensure it’s dry and gentle to avoid pushing the dirt deeper into the leather. This step not only preps the shoes for cleaning but also helps prevent the spread of dirt during the upcoming process. By removing the surface dust, you’ll achieve a more effective clean with the leather cleaner in the next step.
Step 3. Apply Leather Cleaner:
After dusting off the loafers, apply a small amount of leather cleaner to a clean, soft cloth. Gently rub the cleaner onto the shoe in circular motions, covering all areas evenly. Pay particular attention to any stained or discolored spots to lift grime without damaging the leather. Be cautious with the amount of cleaner used; less is often more to avoid saturating the leather.
If available, test the cleaner on a small, less visible part of the shoe to ensure no adverse reaction or color change. This step will help break down any remaining dirt or oils and prepare the shoes for conditioning.
Step 4. Wipe Off Excess Cleaner:
Once you have applied the leather cleaner and it has had time to break down the dirt and oils, it’s time to remove any excess product. Use a clean, damp cloth to gently wipe away the cleaner from the surface of the loafers. Ensure you wring out the cloth well before use to avoid soaking the leather. Carefully review each area, ensuring no residue is left behind, as the excess cleaner can lead to dullness or sticky patches on the shoes.
This step is crucial for ensuring the leather remains clean and fresh, providing a perfect canvas for the following conditioning process.

Step 5. Allow to Dry Naturally:
After wiping off the excess cleaner, it is essential to let your leather loafers dry naturally. Find a well-ventilated area away from direct sunlight or heat sources, such as radiators or hair dryers, as these can cause the leather to dry too quickly and may lead to cracking. Allowing the loafers to dry at their own pace ensures that the leather retains its quality and shape.
Depending on the environment, this may take a couple of hours, so be patient. By letting them dry naturally, you create the ideal condition for the following critical step of conditioning the leather to preserve its softness and durability.
Step 6. Apply Leather Conditioner:
Once your loafers are completely dry, it’s time to apply a leather conditioner. This step is essential to restore moisture to the leather, keeping it supple and preventing cracks. Take a small amount of leather conditioner on a clean, soft cloth and gently massage it into the shoe using circular motions. Make sure to cover the entire surface evenly, focusing on areas that may appear dry or stressed. Avoid over-saturating the leather with the conditioner, as a light application is usually sufficient to maintain its texture.
Let the conditioner soak in for a few minutes, allowing the leather to absorb the nourishing oils fully. Conditioning helps enhance the color and longevity of your loafers, ensuring they remain a stylish and comfortable choice for any occasion. If you have suede loafers, skip this step, as it can lead to staining or discoloration.
Step 7. Buff the Leather:
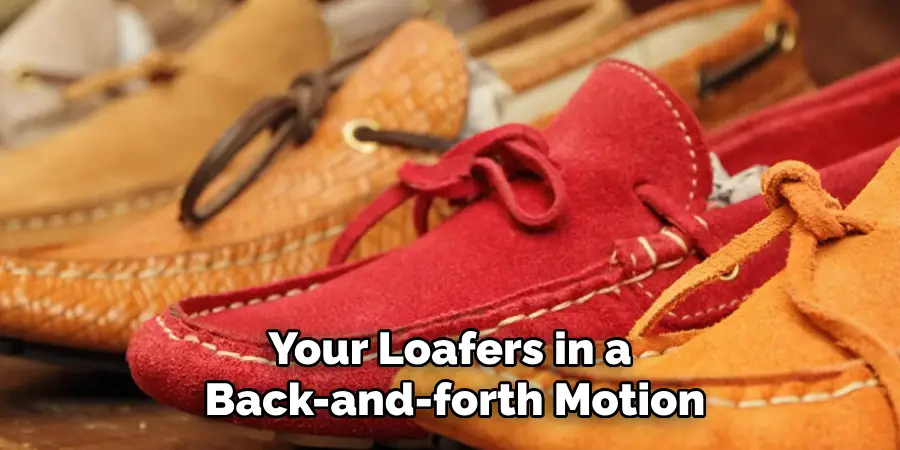
After allowing the leather conditioner to sit for a few minutes and fully absorb, it’s time to buff the leather. Use a clean, dry cloth or a soft brush to gently buff the surface of your loafers in a back-and-forth motion. This step helps remove any excess conditioner and enhances the leather’s natural shine. Pay particular attention to sections that receive more wear, such as the tips and the heel, ensuring an even finish.
Buffing not only improves the appearance of your loafers but also helps to penetrate any conditioner into the leather further, resulting in a soft and polished look. Make sure to use gentle pressure to prevent scratching or damaging the surface. This final touch will keep your loafers sleek and well-maintained, ready to complement any outfit.
Step 8. Re-Lace Your Loafers:
Once you have completed the conditioning and buffing process, it is time to re-lace your loafers. Make sure the laces are clean and fully dry before threading them back through the eyelets. Begin at the bottom, pulling the lace ends evenly to ensure a balanced look. Follow a consistent pattern, such as crisscrossing, to maintain a neat appearance.
This last step secures your shoes and enhances their overall presentation, leaving them looking polished and ready to wear. By taking care of the small details, you elevate the appeal of your loafers, ensuring they complement your ensemble flawlessly.
Step 9. Store Properly:
Proper storage is essential to ensure your leather loafers remain in excellent condition when not in use. Select a cool, dry place away from direct sunlight or extreme temperatures, which can cause the leather to fade or warp. Using shoe trees made of cedar or similar material can help maintain the shape of your loafers and absorb any residual moisture.
Avoid stacking or squashing them among other items, as this can lead to creases or indentations. By giving your loafers the appropriate space and support, you’ll preserve their quality and appearance, ensuring they are always ready for your next outing.
Step 10. Regular Maintenance:
To keep your leather loafers in top condition, engage in regular maintenance practices. Set a schedule, every few weeks, to inspect and clean your loafers, addressing any new dirt or scuff marks promptly. In between full cleanings, you can use a soft, dry cloth to quickly dust off any surface particles, maintaining their shine and cleanliness.
Additionally, consider applying a water-repellent spray on occasion in order to protect against unexpected spills or light moisture, especially if you frequently wear your loafers in inclement weather. By incorporating these routine habits, you ensure your loafers remain a timeless and elegant part of your wardrobe, always ready to make a stylish impression.
By following these ten simple steps, you can effectively clean and maintain your leather loafers, keeping them looking their best for years.

Conclusion
Cleaning and maintaining leather loafers can be a manageable task. By adhering to these straightforward steps, you can extend the life and preserve the beauty of your footwear.
Regular cleaning, allowing for natural drying, and applying the right conditioners are crucial elements to keep leather soft and resilient. Proper storage and periodic maintenance further ensure that your loafers remain in excellent condition, ready to complement various styles and occasions. With a bit of time and care, your loafers will continue offering comfort and sophistication as you wear them confidently.
Hopefully, the article on how to clean leather loafers has given you the necessary guidance and inspiration to keep your beloved shoes looking their best. So go ahead, put these tips into practice, and enjoy your timeless and versatile footwear for years to come.

